How to Fold a Dollar Bill Ring
Learn how to fold a money origami dollar bill ring with the simple step by step instructions on this page.
An origami money ring is a neat way to give a cash gift or leave a tip. Plus, let's face it, it's just kind of fun!
~Brooke"
It seems to me almost like the $1 bill was designed to be folded into a ring. The way the "ONE" is positioned on the note is exactly where it needs to be in order to end up on the front of the ring. It's incredible. In fact, I think it's a conspiracy - there must have been an origami-lover working at the place where the bill was designed ;-)
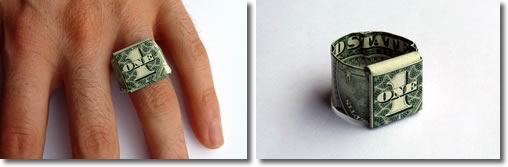
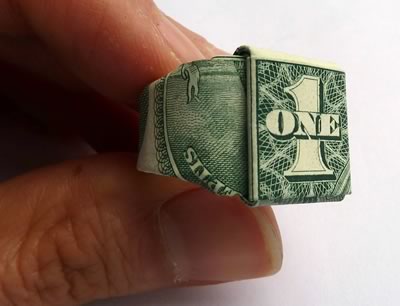
In any case, the dollar bill ring design I'll show you on this page works best with $1 or $10 bills of US currency, but with a bit of adaptation you can also make it work with other size bills or money from other countries. Here's what the finished ring looks like:
Ready to make a ring? You can choose from:
Photos: Dollar Bill Ring Step by Step
Making the ring is easy, I promise! Don't be daunted by the number of steps. It only looks long because I used lots of photos to make each step super clear.
You will need one US$1 bill for this project. Don't have one? Why not print one out - just don't try to buy anything with it!
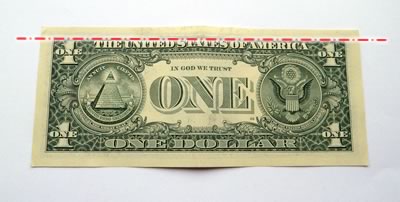
Step 1
Start with the bill this way up. Fold back the top white edge, right where it joins the green part of the bill.
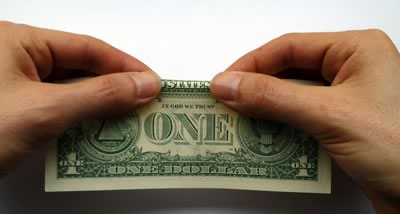
Step 2
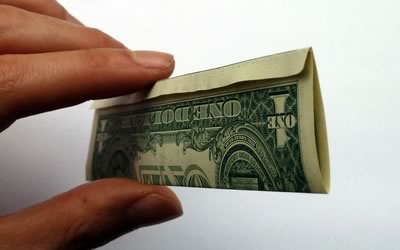
Turn the bill over. Fold the bottom edge up to meet the top, and tuck it under the little flap.
Here's a side view so you can see what I mean about tucking under the little flap:
Step 3
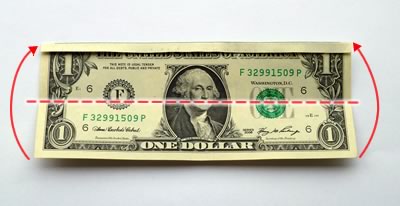
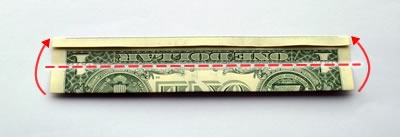
Fold in half again. (But don't tuck under the flap this time.)
Step 4
Turn the bill over so that it's this way up, with "The United States of America" along the top. Then fold back the white edge to the left of the "1", just at the point where it joins the green part of the bill.
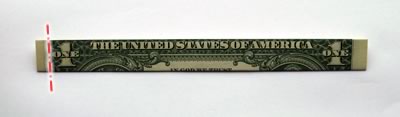
Next, fold back the bill on the right of the "1", so that the "1" looks like it's in a square box:
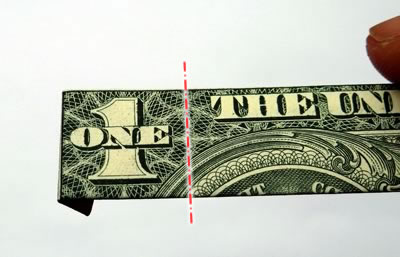
Your bill should now look like this, with a "1 square" on top.
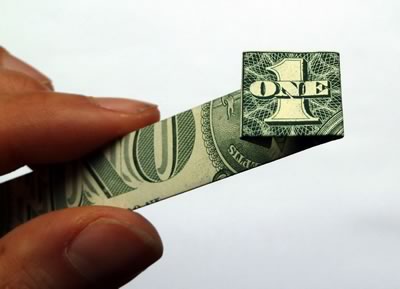
Step 5
Bend the bill so that it looks something like this:
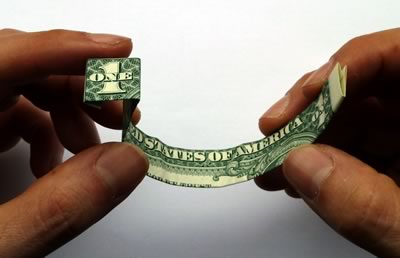
Step 6
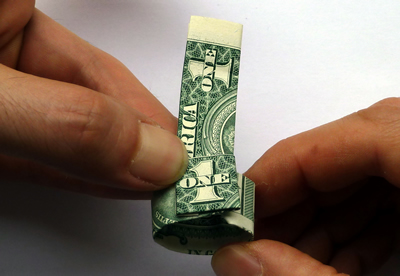
Fold up the right hand part of the bill like in the photo below. Make it so that the left edge of the bit you fold up goes right between the "O" and the "F" of the word "OF" in the "THE UNITED STATES OF AMERICA".
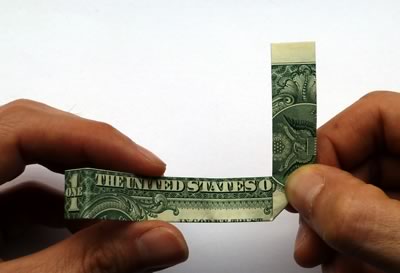
Step 7
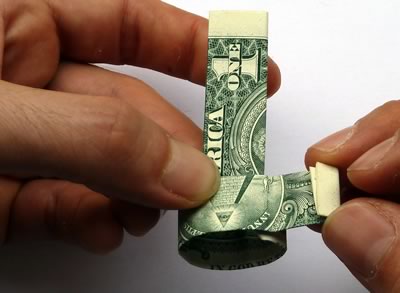
Curve the bill around like this...
...and keep going until the bill looks like the picture below. See how the "1 square" is lined up on top of the vertical poking up bit underneath?
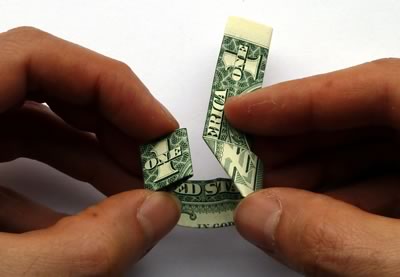
Step 8
Open out the "1 square" to the right, like this:
Then fold down the vertical bit like this:
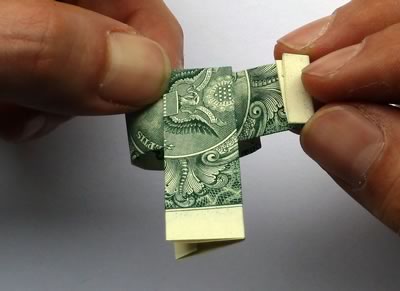
Finally, fold back the "1 square" back on top, and tuck the little flap under the vertical bit you just folded down a moment ago:
Step 9
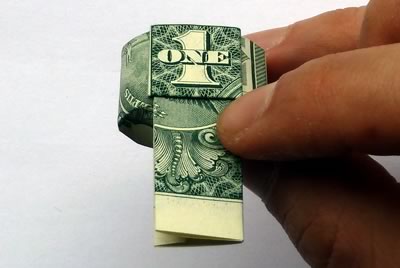
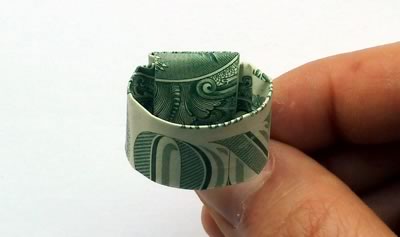
Turn the ring over so it looks like this. Then fold the poking up bit down and through the center of the ring.
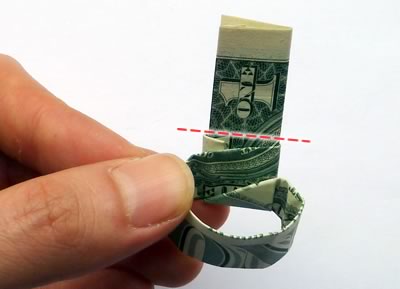
Once you've made the fold, it should look like this:
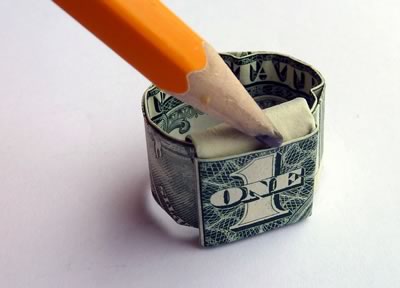
Step 10
Turn the ring over again so that you're looking at it from this angle:

Fold down the little flap, and tuck it under the "1 square". It's a bit fiddly, and it helps to use your fingernails or a pencil:
Step 11 (optional)
I like to fold over the edge of the ring's band, to make it a little narrower, which I think looks more stylish.
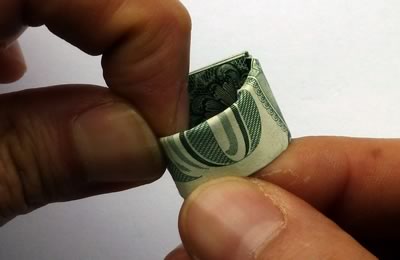
If you choose to do this, here's what your ring will look like from the side:

Finished!
Here's what the finished dollar bill ring looks like:
And here's what it looks like when you wear it:

How did your origami money ring turn out? I hope you found my instructions clear. If you have any questions or comments, or just want to say hi, please contact me with this handy form .
Video: Dollar Bill Ring Step by Step
I came across this excellent youtube video by a guy named Rob who does a great job of demonstrating how to make the ring:
(This isn't my video, by the way - full credit goes to Rob.)
What Next?
I hope you enjoyed making the dollar bill ring! You might like to try some of our other origami money folding projects: