Make Your Own Advent Calendar Wreath

Make your own Advent calendar... with clothespins! This quick craft is fun to do for yourself or with the kids, and everyone will love counting down the days with a candy treat each day!
I wanted to make a really unique Advent calendar this year and thought I would mix the idea of the Christmas wreath with the "treat for each day" concept. I've seen some amazing looking clothespin wreaths out there and thought it would be fun to use that idea but make an Advent wreath instead.

I've used chocolate balls to decorate my candy wreath and chosen quite a simple colour scheme, but this idea can be extended and adorned depending upon what you have lying around.
Depending upon who it is for, you can change the candy to another little treat, or put a thought for each day, or even pin on a few herbal teabags. Whatever will get you through the count-down to Christmas!
Materials
Here's what you'll need to make your own advent calendar out of clothespins:
- wreath template ( download here )
- cardboard
- scissors or cutting blade and board
- 24 wooden clothespins (wooden pegs), 0.4 inches (1cm) wide
- Hot glue gun and glue
- Scrapbook paper or other decorative paper
- Double-sided tape
- Number stickers or stamps.
- 24 chocolate candy sweets (I've used Lindt balls)
- Short length of ribbon to hang wreath
This wreath and the templates are based on using clothespins that are 0.4 inches (1cm) wide. The length can be variable, usually 2.9 - 3.3 inches (7.4 - 8.4 cm) long. The length really doesn't matter, but just for the template to work they need to be 0.4 inches (1cm) wide.
If you can only find wider clothespins then you can still make a wreath but you'll have to experiment yourself with how many will fit around the template and how to space them evenly to ensure symmetry.
How to Make Your Own Advent Calendar
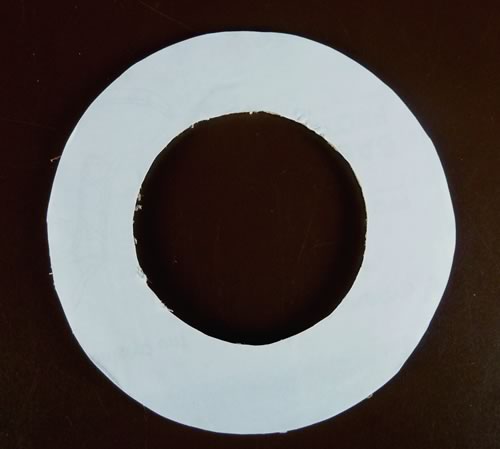
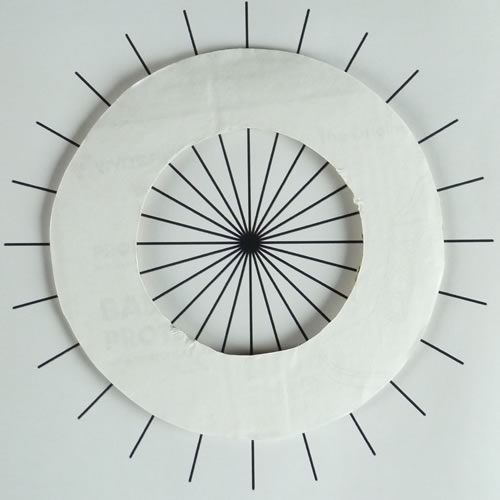
Firstly you'll need a solid cardboard base to attach your clothespins to. Print out the wreath template , cut it out and trace around it onto your cardboard.
Cut out the wreath backing from cardboard using scissors or a blade. I used cardboard from an old shoebox and glued on some white paper once I'd cut it out to cover the advertising pattern.
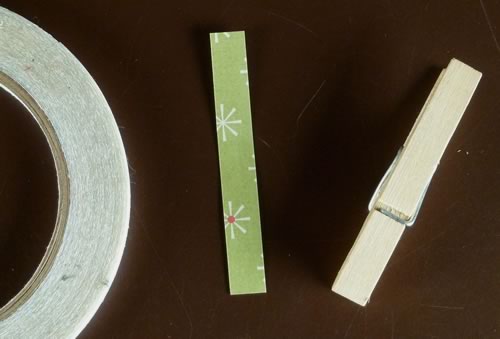
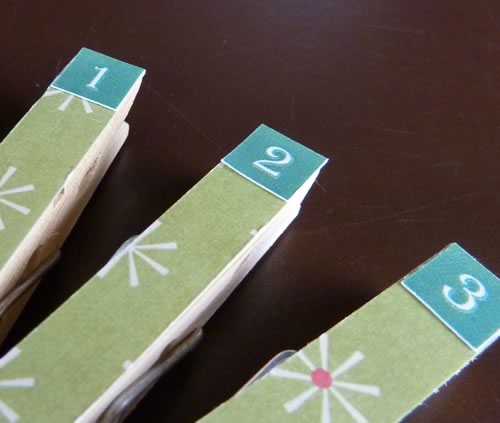
Cover the 24 clothespins with a strip of scrapbook or other decorative paper. I've chosen to use strips of paper from the same piece of paper on my pegs, but I think it could look much nicer with a mix of brighter colours too. I stuck each strip down with double-sided tape to make it quicker to assemble (no drying time!), but you could use regular paper glue too.
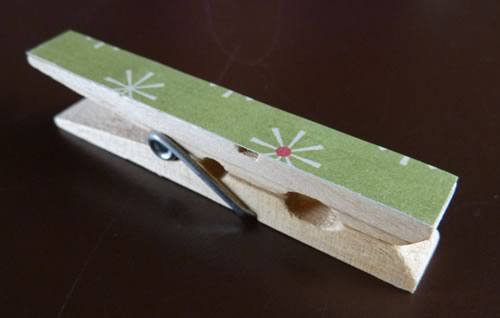
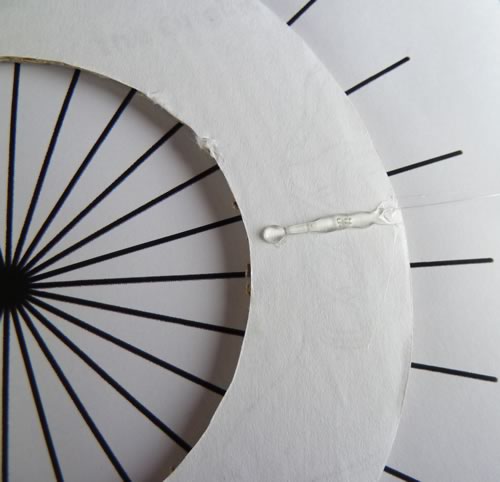
And here is a close-up of a covered clothespin. As long as you get the width of the strip of paper correct it is really easy to trim any excess from the ends of the peg once the paper is stuck down, using a blade.
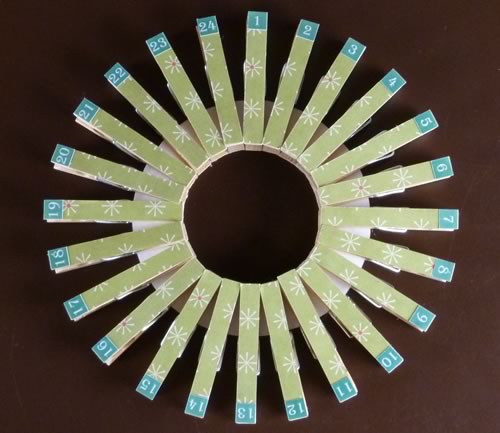
To stick your pegs evenly around the wreath so that it looks all symmetrical here's a handy little template . Once printed, line up the outer circle of your cardboard base with the circle line on the template, and you'll be able to use the radiating lines to help align the pegs symmetrically around the wreath.
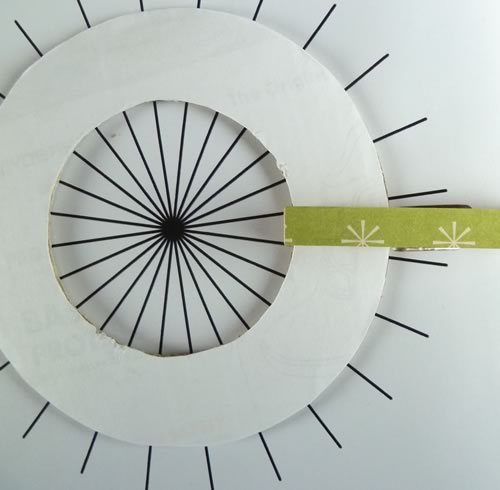
Now it is time to work relatively quickly (and to supervise the kiddies!). Using a hot-glue gun, make a stripe of glue in the middle of one of the segments.
Now glue down the clothespin so that the "pin" bit is facing towards the outside of the wreath (to hold your candy), and so that the other end of the clothespin lines up with the template divider on the inner circle edge.
Continue gluing all the clothespins down until you've completed your wreath.
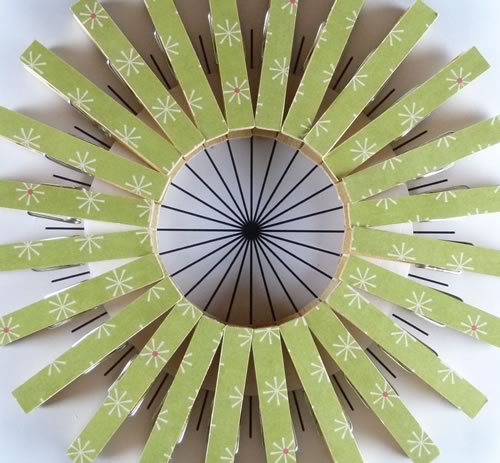
So at this stage you've already made a peg wreath which could be hung up, adorned with Christmas cards or notes etc. To make your own advent calendar you'll need to add numbers to each clothespins. You could have done this step earlier, but then you'd have to make sure you glue them all down in the right order, so I preferred to add the numbers at this stage. Either way works though!
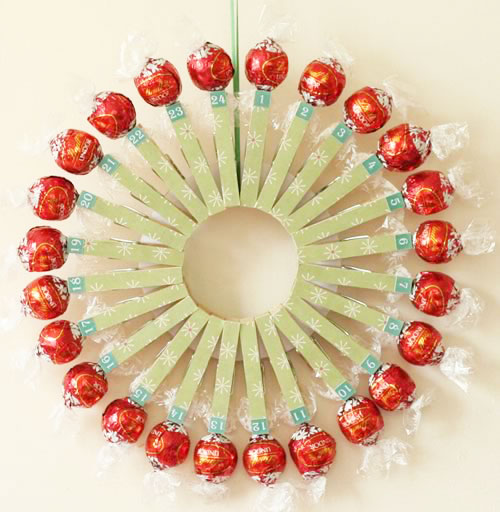
And now you've finished! Just add a ribbon and pin in the candy. I looped my ribbon around the gap between peg 24 and 1 to make that the top of my wreath, but it doesn't really matter where you start it off. It's so easy to make your own advent calendar with this method, and fun to make for friends and family too!
How did yours turn out? If you have any questions or comments, or just want to say hi, please contact me with this handy form or leave a comment at the bottom of the page.
More Christmas craft tutorials
Make your own advent calendar with an different (origami) design, or check out our Christmas ornament tutorials...