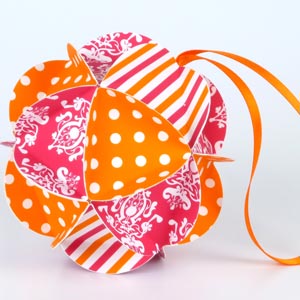
How to Make Paper Lanterns

Looking for instructions on how to make paper lanterns? We've created an easy template for you to make paper lanterns in a cute round shape.
These "lanterns" are purely decorative and aren't designed to have a lamp inside them, but they do make great festive decorations. In fact, they started out as a design for Christmas baubles.

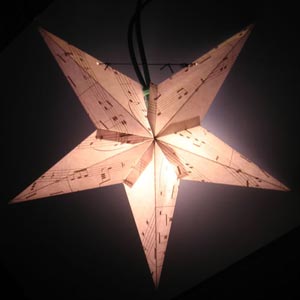
By the way, if you want to learn how to make a lantern that you can put a lamp inside of, then check out my instructions for making paper star lanterns .
They make great homemade gifts to post in the mail because they can pack flat. And they look so pretty with the light shining through them :-)
Instructions: How to Make Paper Lanterns

Before we get started, here's a little cartoon to give you the big-picture of how everything fits together. Basically there's a thread that runs through the lantern from top to bottom, with a knot at each end to hold things in place.
Equipment
- pretty paper or card-stock
- printer
- scissors
- glue or double sided tape
- needle and thread
You'll also want to download my round paper lantern template . The pdf file has templates in two different sizes, so you can choose how big you'd like your lantern to be. The bigger template makes a grapefruit-sized lantern, and the smaller template makes mandarin-sized lanterns.
Print the template onto your paper or card-stock, making sure that you print onto the blank side! All done with the printing? Now on to how to make paper lanterns...

Step 1: Cut out along the solid lines, and you should have something that looks like this. Notice the little glue-tab on the left.

Step 2:
Glue the glue-tab to the spot marked "X" to create a sort of cylinder like this. (You'll see the "X" when you print the template.) Make sure the pattern is on the outside!

Step 3: Prepare a piece of thread or wool about 15 inches long. Double the thread over a couple of times near one end and then tie a simple overhand knot like this.

Step 4: Trim the knot to make a little tassel.

Step 5: Thread the cord through one of the circle-shaped bits on the lantern, from outside to in. Which ever end of the lantern you start on will be the "bottom".

Step 6: Thread the cord through all the remaining circle-shaped bits on the bottom of the lantern. Pull the cord through to the top of the lantern. The bottom of the lantern should now look like this.

Step 7: Thread the cord through each of the circle-shaped bits on the top of the lantern, from inside to out.

Step 8: Tie a knot to keep things in place. It helps to poke a pencil into the knot as you tie it. By pulling the pencil up or down the thread, you can position the knot exactly where you want it.

Step 9: The top of the lantern with the knot in place should look like this. Well done, you've finished!
In this photo you can see that I've also decorated the edges of my lantern with gold pen.
The finished lantern from different angles:
Related pages
I hope you enjoyed learning to make paper lanterns! Now have a go at making...