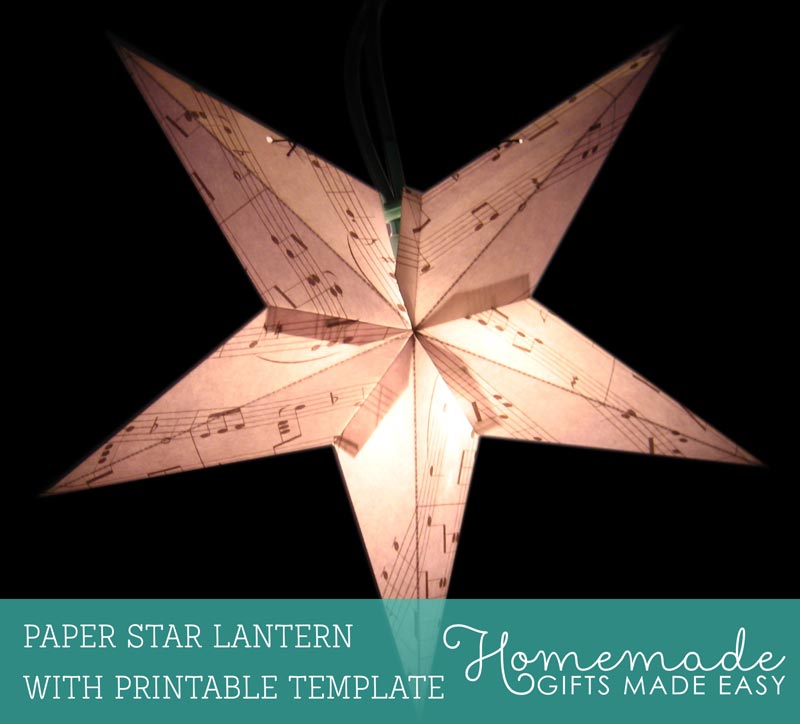
How to Make a Paper Star Lantern
Every time I see a paper star lantern in the shops, I think "Wow, how beautiful! I must try making one of those".
Well, I'm pleased to say that I've now learned how to make paper lanterns. Along the way we've created some templates (which I'll share with you), so now making these lanterns is easy peasy.
By the way, these paper star lanterns make pretty decorations even without lights inside. You could make golden one to put on your Christmas tree :-)
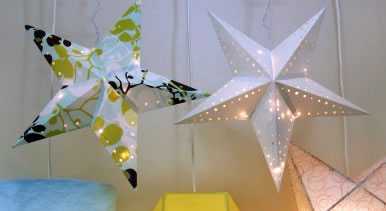
Here are some star lanterns made by Monica over at craftynest.com using our tutorial and template.
Equipment You'll Need
- pretty paper or card-stock
- printer
- scissors
- glue or double sided tape
- needle and thread
The first thing you'll need to do is download the paper star lantern template . The pdf file has templates in three different sizes, so you can choose how big you'd like your lantern to be.
Print the template onto your paper or card-stock, making sure that you print onto the blank side! The lantern is made of five modules, so depending on the size of template that you use you might need to print several pages.
All done with the printing? Now on to how to make a lantern...
Instructions for How to Make Paper Star Lanterns
 Step 1:
Cut out along solid lines, and make creases along dashed lines. Each module looks like this, and you'll need five all together.
Step 1:
Cut out along solid lines, and make creases along dashed lines. Each module looks like this, and you'll need five all together.
 Step 2:
Glue module into a cone-shape using the glue-tab on the side. This is the view into the cone. Make sure you glue the tab onto the inside of the cone so it's hidden away.
Step 2:
Glue module into a cone-shape using the glue-tab on the side. This is the view into the cone. Make sure you glue the tab onto the inside of the cone so it's hidden away.
 Step 3:
Glue all the other modules into cones too, so that you have five cones like this. If you like, at this point you could also use a hole-punch to make some holes for the light to shine out through.
Step 3:
Glue all the other modules into cones too, so that you have five cones like this. If you like, at this point you could also use a hole-punch to make some holes for the light to shine out through.
 Step 4:
Pick two of the cones and glue them together using the glue-tabs. The two tabs of one cone go inside the adjacent cone, like this.
Step 4:
Pick two of the cones and glue them together using the glue-tabs. The two tabs of one cone go inside the adjacent cone, like this.
 Step 5:
Continue gluing all the cones together until all five are connected, but don't glue the first and last cones together. Instead, thread a few inches of cotton halfway up the first cone, and halfway up the last cone, like this. Exception: If you just want the lantern as a decoration without any bulb inside, then go ahead and glue the first and last cones together.
Step 5:
Continue gluing all the cones together until all five are connected, but don't glue the first and last cones together. Instead, thread a few inches of cotton halfway up the first cone, and halfway up the last cone, like this. Exception: If you just want the lantern as a decoration without any bulb inside, then go ahead and glue the first and last cones together.
 Step 6:
Insert a light (e.g. a fairy light) into the lantern, and then tie the two lengths of cotton together to pull the star into shape. Tying the cotton also makes the "mouth" of the lantern close tight over the bulb and to keep the lantern in place.
Step 6:
Insert a light (e.g. a fairy light) into the lantern, and then tie the two lengths of cotton together to pull the star into shape. Tying the cotton also makes the "mouth" of the lantern close tight over the bulb and to keep the lantern in place.
 Step 7:
Getting the knot in the right place can be tricky. It helps to poke a pencil into the middle of the knot as you tie it. You can adjust the position of the knot so long as the pencil's in there. That way you can adjust the tension in the cotton to just the right level before you finish the knot.
Step 7:
Getting the knot in the right place can be tricky. It helps to poke a pencil into the middle of the knot as you tie it. You can adjust the position of the knot so long as the pencil's in there. That way you can adjust the tension in the cotton to just the right level before you finish the knot.
 Step 8:
When you untie or snip the cotton, the lantern packs flat for storage or posting. Neat :-)
Step 8:
When you untie or snip the cotton, the lantern packs flat for storage or posting. Neat :-)
Caution: Don't leave the lantern unattended with the bulb lit inside it!
Some bulbs can get quite hot, and I'd hate for your lantern to catch on fire! The best sorts of bulbs to use are compact fluorescent bulbs and LED bulbs, which usually stay fairly cool.
Tape vs glue: I prefer using double-sided tape rather than glue, because it's quicker and easier to work with. However, a really hot light-bulb might melt sticky tape, so just be careful.
Looking for more Stars & Lanterns?
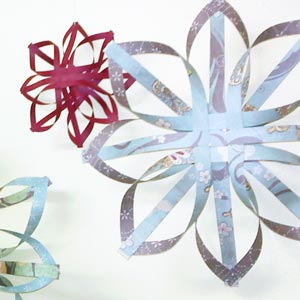
I hope you enjoyed making a paper star lantern! Here are some more star and lantern projects you might enjoy...


Other People Also Like...
Check out these beautiful printable gift ideas for Christmas. So easy to personalize and print at home!