Ribbon Bow Tying Instructions

Use these ribbon bow tying instructions to wrap your gifts beautifully.
Tying ribbon bows is one of those things that looks so simple, but then turns out to be a little tricky. You try to tie a bow neatly, but then it turns out wonky, lopsided or creased... sound familiar?
I used to think I was "bow-challenged" until I learned the right technique for how to tie a ribbon. Once you know how to make ribbon bows, it's really quite simple.
Simple Bow
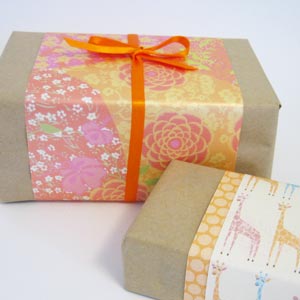
"Ye olde basic simple bow". You can attach of these to the top of a gift parcel with glue or adhesive tape (top left pic on this page), or else tie one around your gift parcel (top right pic on this page). Tying one is as simple as 1-2-3.

Step 1 : Gather a small loop of ribbon in each hand.

Step 2 : Tie in an simple overhand knot... the way you tied your shoelaces when you were a kid

Step 3 : After step 2, the bow will be facing away from you. Turn it around, straighten it up a bit, and there you have it, a perfect bow. Now you can cut the loose ends to the right length.
Tying a Ribbon Bow around a Box
This is the classic way to tie a ribbon around a box - once in each direction, with a bow on top. Just the like the top-right photo on this page. The process is easiest to explain with a video.
Click the image below to play.
What next?
I hope you enjoyed my ribbon bow tying instructions! While you're in the gift-wrapping groove, do take a look at some of our other gift wrapping tutorials: