Make your own gift box with lid
Make your own gift box - it's quick, easy, and can really dress up a gift!
Follow my video tutorial or picture instructions to make a colourful box with matching lid. These boxes are surprisingly sturdy and are perfect for holding some chocolates or a nice soap.
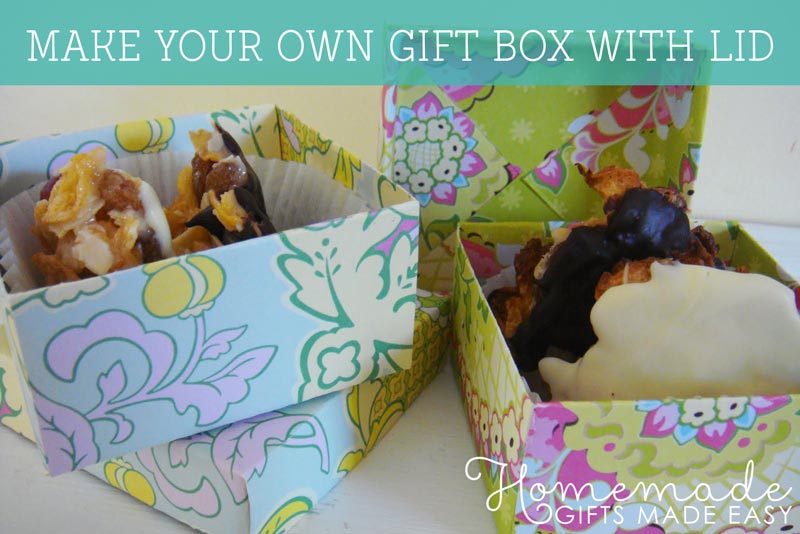
Image courtesy of Lou aka HausFrau
The real masters of making gift boxes are the Japanese. In fact, the design on this page is based on the traditional "Masu" origami gift box design.
I've modified it a bit, because traditional origami doesn't use any cuts. However, I've tried the making boxes both with and without the cuts, and the version with cuts always comes out neater. So, that's the version I'll show you here.v(If you're an origami purist, and want a design with no cuts, check out the
one piece box with built in lid
.)
What's special about this box?
- Perfectly fitting lid - Some of the other instructions out there on the web tell you to make the lid the same way as the base, but from a slightly larger piece of paper. But if you do that, then the lid completely swallows up the base when you close the box, and the box is hard to open! So, I'll show you how to make your own gift box with a perfectly fitting lid, just like the one in the photo at the top of the page.
- No ugly creases - Your box will look pristine and beautiful, because the folding method shown here means that your box won't have any visible creases on the lid or base :-)
-
Optional divider
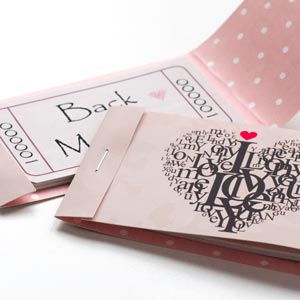
- I'll also show you how to make an optional divider for your box, which is great if you're using it to hold small food gifts like
truffles
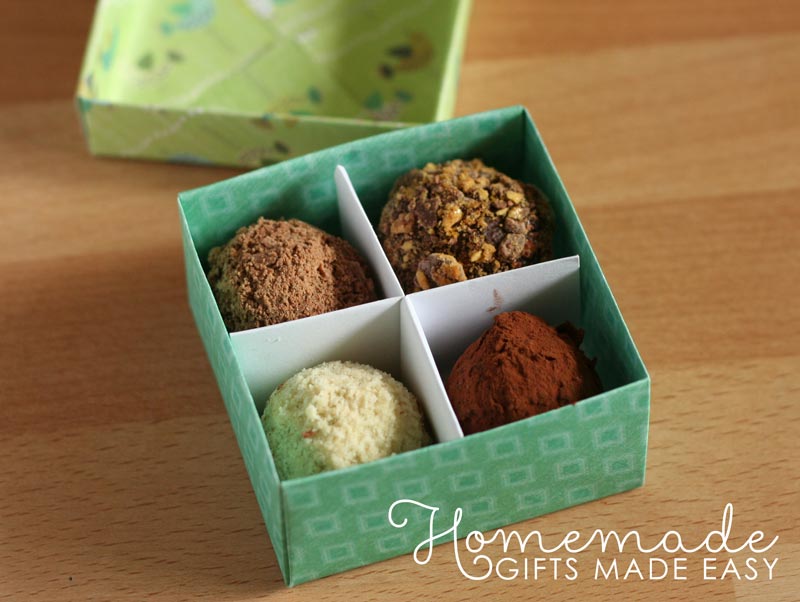 Box of truffles showing optional
divider
Box of truffles showing optional
divider
-
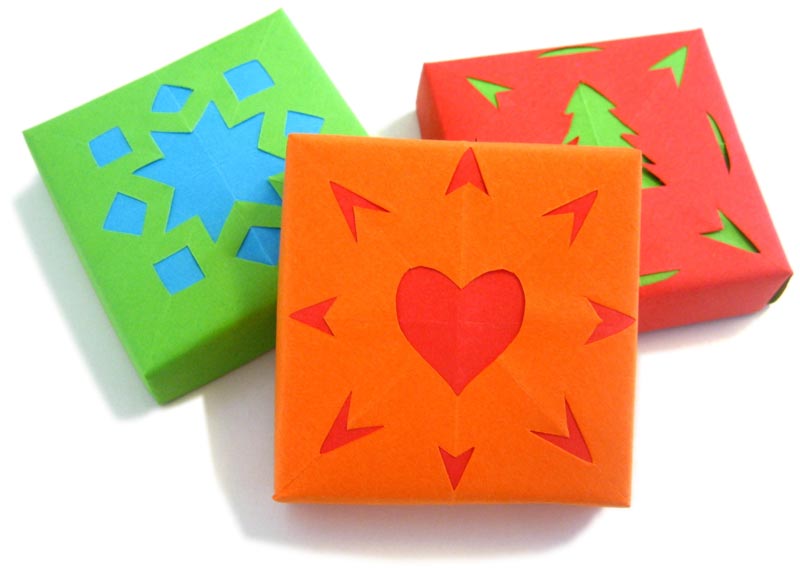
Patterned lids
- You can sparkle up the design by using two sheets for the lid, with paper cutouts in one of them, to make cute patterned lids.
Anyway, on to the instructions. Grab two sheets of paper or card - it's time to make your own gift box!
Video: Make Your Own Gift Box
To make a box 4 x 4 x 2" (10 x 10 x 5 cm), you will need
- 11.5 x 11.5" (29 x 29 cm) card-stock for base
- 12 x 12" (30.5 x 30.5 cm) card-stock for lid
You can make the box a different size if you like, but make sure that for the base you always use a sheet about 1/2" smaller than what you use for the lid.
Click arrow to play the video instructions:
If the video keeps stopping and starting (which might happen if you have a slow internet connection), then pause it and come back in a few minutes when it's finished loading. Or, follow my step-by-step photo instructions instead .
Video: Gift Box Divider
Here's a video I found (not mine) that shows how to make the optional internal divider. You should make the divider from the same size of paper that you used to make the box base.
Picture Instructions for Box Base
This design works best with thin card, about the same thickness as a greeting card. In fact, you can even make your own gift boxes out of last year's Christmas cards.
Sizing: If you make your box from a 12 inch square, it will turn out the same size as a tie box, about 4 by 4 by 2 inches.
Make the base from a square piece of paper, with side lengths 1/3 of an inch (1cm) smaller than the piece you use for the lid . But if you use really thick card, then use a square with side lengths 2/3 of an inch (2cm) shorter than the lid-piece.

Step 1 : Start with a square piece of paper, nice side facing down. Make a small crease in the centre of each side. I like to mark each crease lightly with a pencil too.

Step 2 : Fold all four corners to the centre, using the creases from the previous step as guides.

Step 3 : Fold and unfold each side to the centre.

Step 4 : Unfold everything. You will have the pattern of creases shown here. Cut along the bolded lines.

Step 5 : Fold top and bottom corners to the centre.

Step 6 : Fold flaps up along the dotted lines so that they point straight up toward you.

Step 7 : Fold top and bottom edges so that they point up toward you.

Step 8 : It should look like this. Now fold the flaps on the left and right into the centre.

Step 9 : Finished!
Picture Instructions for Box Lid
Remember to use a larger piece of paper for the lid. About 1/3 of a inch larger if you're using thin card, or 2/3 of an inch larger if you're using thick card.

Step 1 : Follow steps 1 to 3 of the base instructions . Then unfold until your paper looks like this. Finally, fold the top and bottom edges to the centre, as shown by the dotted lines here.

Step 2 : Fold and unfold along the dotted lines shown here.

Step 3 : Completely unfold the paper. You will have a pattern of creases like this. Cut along the bolded lines.

Step 4 : Fold the top and bottom corners to the centre.

Step 5 : Fold along the dotted lines shown here

Step 6 : The rest of the folding is the same as step 6 and onward of the base instructions. Fold the flaps up to face you, etc...

Step 7 : Finished! Here's a picture of the lid and base together.
Card-stock to Make Your Own Gift Box
I found that 12 x 12 inch scrapbooking paper is the perfect size for making these boxes. Usually I buy mine at a scrapbooking store but sometimes I also find some beautiful papers on eBay.
Another option is to make the boxes out of wallpaper, which lets you make a larger box. I came across some beautiful photos on Lorajean's magazine of boxes she'd made from wallpaper.
More Ideas
Now that you know the trick of how to make your own gift box, you can experiment with different papers and ribbons. Use greens and reds for Christmas, pinks and reds for Valentine's Day, red and brown for chocolates, blue and white or other masculine colours if the gift is for a guy... you get the idea. Just have a go and try out different combinations.
Or, have a go at a different box design. You know how to make your own gift box with a detachable lid, so now have a go at making the gift box with built-in lid .
Finally, while you're still in a folding mood, have a go at folding some
money origami
:-)
Other People Also Like...
Looking for more unique homemade gift ideas? Check out our quick and easy printable gifts. So easy to personalize and print at home!
Printable coupons, "Likes" posters, "Year You Were Born" birthday posters, retirement posters, personalized newspapers... we have so many great ideas to help you celebrate most occasions.