Paracord Bracelet Instructions
How to Make 2 color Survival Bracelets
Paracord bracelets are a neat bit of gear. If you're an outdoors type of person, or you want to make a gift for an outdoors type of person, then this is the project for you.
Each bracelet is in effect a miniature survival kit, holding 10 feet of 550 paracord. Use it to construct an emergency shelter, or repair your rucksack with the yarns in the central core.
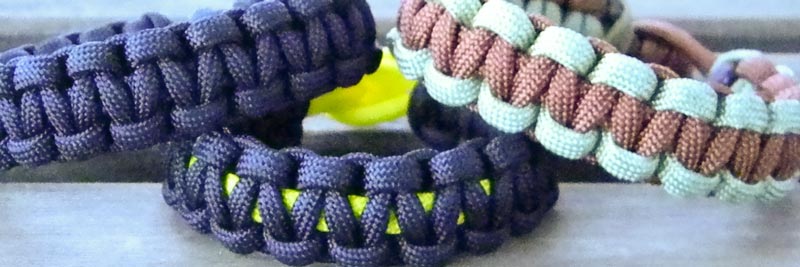
The bracelet is comfortable to wear and has a neat two-tone effect. You could even make one using the colors of your favorite sports team. Of course, you can use these same instructions to make paracord bracelets in a single color, like these:

Paracord is strong stuff. It was originally used in the suspension lines of US parachutes in WWII. The "550 cord" typically used in paracord bracelets has a minimum breaking strength of 550lb (250kg).
Making the bracelet is actually really easy. Don't get freaked out by the length of this page - it's only that long because I put in plenty of pictures for each step. You'll probably finish your first paracord bracelet within 20 minutes or so.
First up, you'll need to gather your...
Paracord Bracelet Materials
You will need:
- 5 feet (1.5m) of paracord in one color
- 5 feet (1.5m) of paracord in another color*
- 2 1/2 feet (75cm) of paracord in whatever color
- Scissors
- Lighter
- Optional: needle and thread
* If you just want a single-color paracord bracelet, then you just need 10 feet of paracord in one color instead of two 5-foot lengths
The most popular cord for paracord bracelets is called "550 cord". It's about 1/5" (5mm) in diameter. You can buy it at army surplus stores, camping and outdoor stores, or ebay.
You can also use other types of cord. The red cord in the bracelet on this page is a 5mm climbing rope, rated to 1000 lb - almost twice as strong as 550 paracord. The black cord is an inexpensive "all purpose utility cord" that I found at an army surplus store.
You won't need a plastic buckle because the method I'm going to show you is for a paracord bracelet without buckle, which personally I like better.
Right. Now that you've got the materials, get ready to follow my...
Paracord Bracelet Instructions
Step 1 - Set Bracelet Size
Double over the 2 1/2 foot length of paracord, and tie a simple overhand knot an inch or two from the loose ends. Like this:

Check the size of the bracelet by putting the loop over the knot, like below. This will be the size of the bracelet:

It's best to make the bracelet slightly loose. The band will become fatter and fit more tightly once it's finished. Don't worry too much about getting the size exactly right at this stage, because you'll have a chance to fine-tune it later.
 Optional: For a sharper look and more secure closure, use a lanyard knot (right) instead of a simple overhand knot.
Click here for easy step-by-step lanyard knot instructions.
Optional: For a sharper look and more secure closure, use a lanyard knot (right) instead of a simple overhand knot.
Click here for easy step-by-step lanyard knot instructions.
Don't worry about the loose ends poking out of the knot. Later on (step 4) I'll show you how to hide them.
Step 2 - Join Long Pieces Together
Skip this step if you're making a single-color paracord bracelet.
Join together the two longer pieces of paracord, using the method in the video below. I usually write my own instructions, but in this case someone else has already put together excellent instructions:
I like to reinforce the join by making a few stitches through it with needle and thread. Here's a join that I made:

Don't worry if your join isn't the neatest, because it will be hidden on the inside of the bracelet. Just make sure that you melt down any scratchy edges, because the join will lie directly against your wrist.
In case you're wondering: yes, the join is a weak spot, so if you ever have to use the cord in a survival situation I'd recommend pulling the two halves apart and then re-joining them with a rock-climbing knot .
Step 3 - Cobra Stitch
Arrange the paracord pieces in a "t", with the long, joined piece behind the short piece. The join in the long piece should sit directly beneath the short piece. Here's a big-picture view and a zoomed in view of what I mean:

Now comes a knot called cobra stitch , also known as a Solomon bar or Portuguese sinnet . Whatever you call it, it's pretty straightforward.
First, you take the right arm of the "t" and throw it over to the left - in my case, that's the red strand. Then feed the left (black) strand through the loop made on the right, as the green arrow shows here:

Here's a series of photos to make it clearer. When you tighten the knot, leave about 1" (2.5cm) of loop at the top. Make your knots firm, but not too tight. (Too tight and the bracelet will be stiff and inflexible.)

Then make another cobra stitch that's a mirror image of the first one. For me, that means folding the red strand from left to right, then feeding the right (black) strand behind and through the loop, as shown by the green arrow here. It's exactly what you did for the first cobra stitch, but with left and right reversed.

Just to make it super-duper clear, I've also made a here's a cobra stitch video instructional (opens in new window).
Continue adding more and more cobra stitches, alternating sides. It will always be one color that you fold over the top, and the other color that you tuck behind and through the loop. For me, it's always the red strand that goes over the top, and the black strand that gets tucked behind and goes through the loop.
You can bunch the stitches closer together by holding onto the overhand knot at the bottom of the bracelet, and pushing the cobra stitches up toward the loop at the top. Put something through the loop first (e.g. a ruler), to stop the stitches sliding right off the top. Here's what I mean:

Keep adding cobra stitches until you get to within about 1/2" (1cm) of the granny knot at the bottom. Once you've made all the cobra stitches, your bracelet will look something like this:

Optional: Use needle and thread to fasten the end-most cobra-stitch (red) to the central core of paracord (black), at the position of the green arrow. This stops the cobra-stitches from sliding along the central core, and makes sure that the 1" loop at the end stays the correct size.
Put the bracelet around your wrist and check the fit. Adjust the position of the overhand knot to make the bracelet tighter or looser.
Step 4 - Tidy Up Loose Ends
After checking that your bracelet is the right size, it's time to snip off all the loose ends. You'll have two loose ends from the overhand knot, and two loose ends from the cobra stitch.
Pick one loose end to start with. Cut it short, to leave about 1/4" (5 mm) poking out of the bracelet.
Melt this end with a lighter, and press on the molten end with a wet finger (or the flat edge of a knife). This stops it fraying. Also, by pressing on the end, you squash it into a sort of mushroom shape, which stops it working loose. Just be careful not to burn your fingers!
Repeat for the other loose ends.
Here's a picture of one of the molten ends to show you what I mean:

That's it! Your bracelet is finished. Cool huh?

More Bracelet Pics
Here are some neat ones made by Alan from the UK:

And here are some two-color ones sent in by reader Liz:
And here's one from Simon, who writes "I'm rockin the crimson and gold this month to celebrate the Marine Corps B-day! The whole thing is a basic cobra knot, but I started by doing two passes with the red, then making those strands part of the core along with the yellow, then simply did the black, and finished up with two more passes of the red. I think it makes a cool transition between the body of the bracelet and the tie-off, as well as a nice clean two-color core."

Thanks for sending us your pics, guys!
What Next?
How did you go making your paracord bracelet? You might also like to have a go at making a paracord lanyard .
If you're making a paracord gift for your Dad for father's day, check out our father's day quotes, messages, and poems to help you write a great card to your Dad too.
If you have any comments or suggestions on my instructions, or just want to say hi, then please contact me with this handy form .