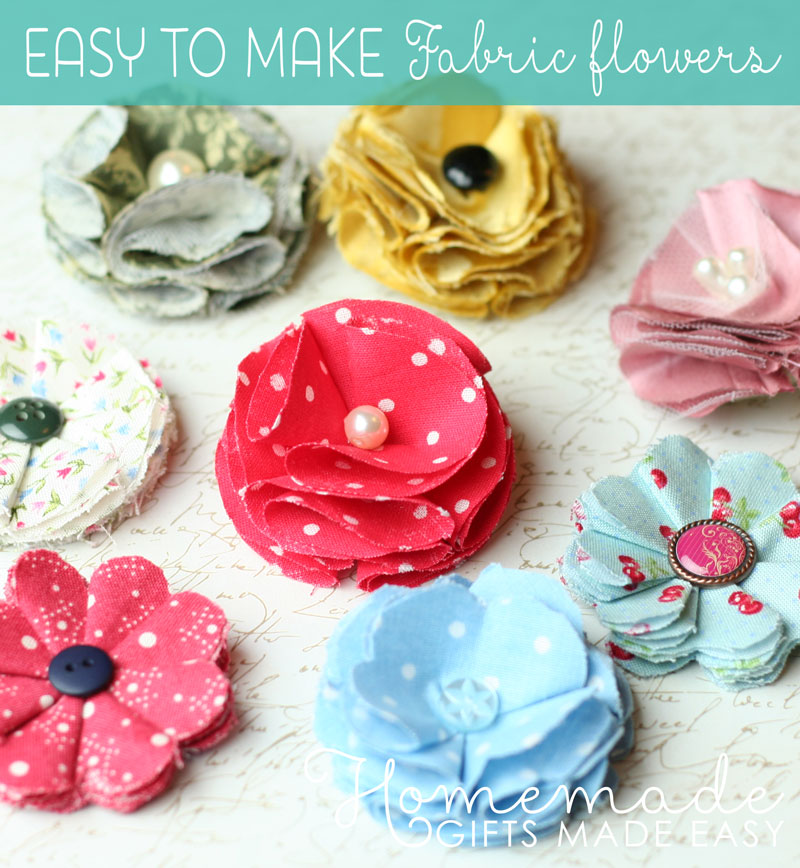
Easy to Make Fabric Flowers
Make fabric flowers in only a few minutes using scrap fabric and a hot glue gun. We'll show you instructions for how to make two different floral designs that we think will dress up any outfit. So simple, and they look gorgeous!
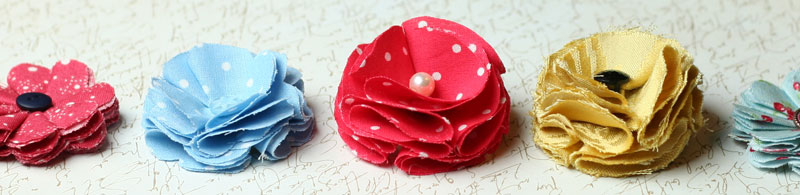
Handmade fabric flowers are easy to make and so versatile. You can use them to make hair flower clips (I'll show you how), wear as a brooch to brighten up an outfit, or sew them onto a bag. They're a great way to use up scraps of fabric, and best of all they only take a few minutes to make!
On this page we'll show you two methods to make fabric flowers in two different designs; a flat pin-wheel type design, or a more rounded, 3D design.

Materials
For either type of fabric flower you will need:
- Scrap fabric about 8 x 8 inches in size (~20 x 20 cm)
- Optional - the same amount of tulle, for a fancier touch
- Small amount of felt in a matching/complementary color to your fabric
- button, beads, or sparkly embellishment
- fabric scissors
- hot glue gun (I own a Stanley) and glue
- alligator hair clips or brooch backing of some kind
Now... which type of flower would you like to make?


Make fabric flowers - rounded style
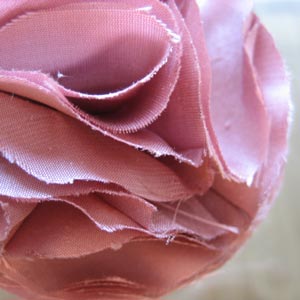
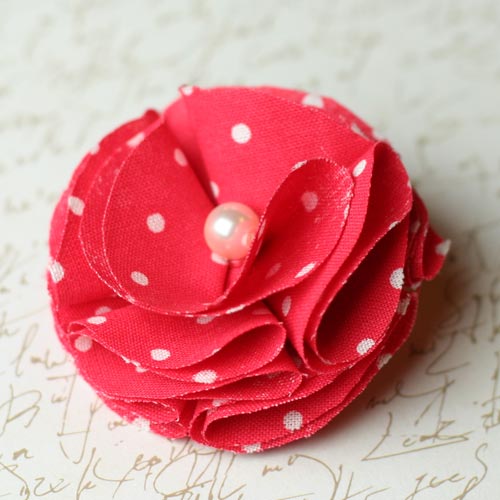
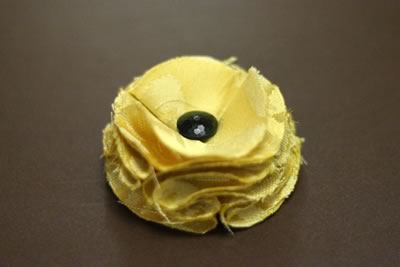
In this section I'll show you how to make a rounded flower like this. It works best if you use a fabric that's colored on the "wrong" side too, because you'll see both sides of the fabric in the finished flower.
Also, I find that it works well with fabrics that area a little bit stiff or springy, so that the flower holds its shape.
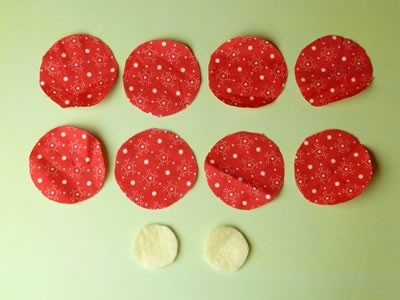
Step 1 - Prepare your materials
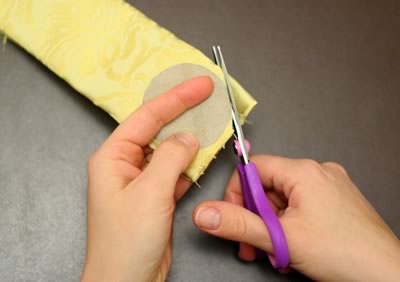
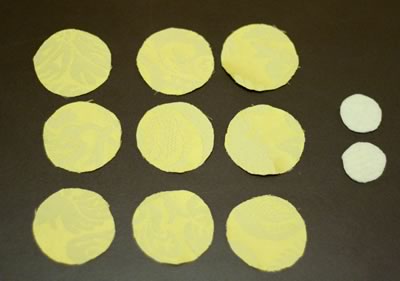
Cut out 9 circles of fabric, about 2 inches (5 cm) in diameter. This will be the size of the finished flower, so you can modify your circle size accordingly.
If you're adding tulle to your flower, then you'll need 9 circles of tulle too.
Cutting out 9 circles can be tedious, so you can save time by folding your fabric over and cutting out several circles at the same time.
You'll also need to cut out two smaller circles from felt. Mine are about 1 inch (2.5 cm) in diameter.
Step 2 - Glue your flower together
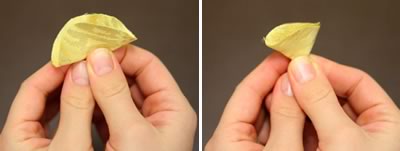
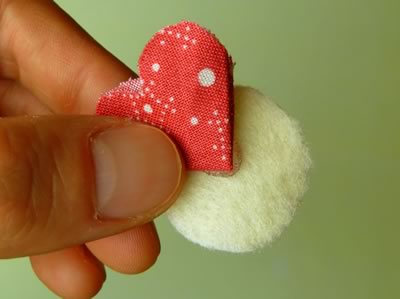
Fold your first fabric circle in half and then in half again to make your first "petal".
(If you're using a layer of tulle too, fold one circle of this together with your fabric)
Place a blob of hot glue on the folded corner.
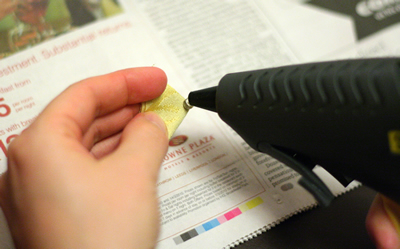
Glue the first petal down onto the felt circle.
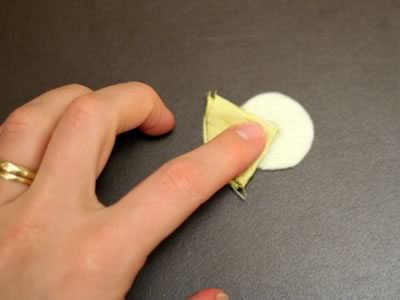
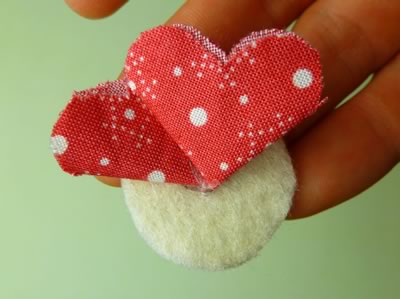
Glue down three other petals to complete the first layer of your flower.
Now glue down the first petal of the second layer. I like to offset the petal from ones below, but I don't think it really matters.
Glue down the next three petals to complete your second layer. You can "fluff" up the petals at this stage to give your flower more structure.
Now you need to add your final petal to the center of the flower. Fold it as above, and glue it down in the center with a small blob of glue.
Step 3 - Finish off your flower
You can leave your flower as is, or embellish it with a button, pearl or bling of some kind. Here I've glued a sparkly button in the center :-)
Step 4 - Glue on a clip
Now you'll want to secure a clip onto the back of your flower. Here I'll show you how to attach it to a small hair clip but you can easily attach it to a brooch backing or sew it directly onto an outfit or bag.
Make two small cuts in the second circle of felt and feed your clip through the cuts.
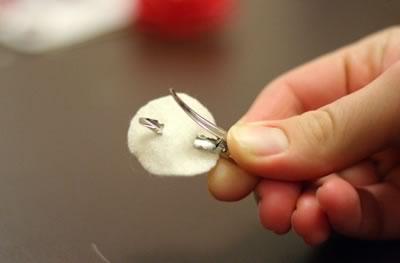
Place a small ring of hot glue on the circle of felt.
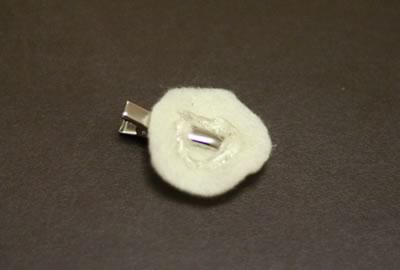
Press your clip firmly onto the back of your flower to secure the clip in place.

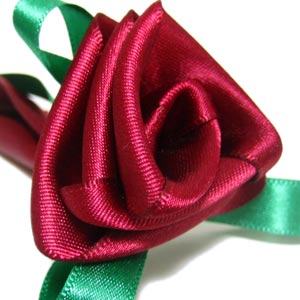
Make fabric flowers - pinwheel style
In this section I'll show you how to make fabric flowers in a flat "pinwheel" style like this one. They look a little bit like daisies.
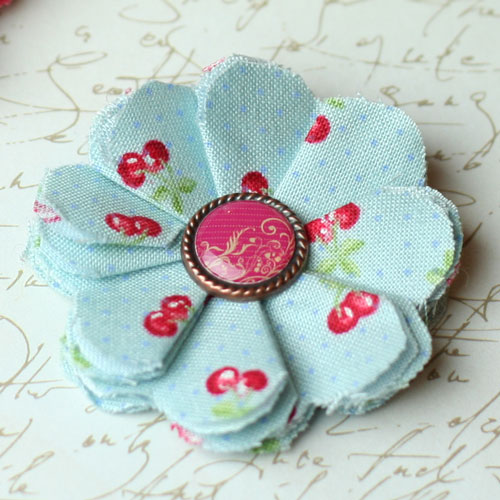
A good thing about this style is that it's OK to use a fabric that's patterned on one side and blank on the other. Because of the way the petals are folded, the wrong side of the fabric will be hidden.
Step 1
Cut out 8 circles of fabric, about 2 inches (5 cm) in diameter. The size of these circles will be the size of the finished flower, so you can make them bigger or smaller if you like.
Also, cut out 2 smaller circles of felt, about half the diameter of the others. Mine are about 1 inch (2.5 cm) in diameter. These will go on the back of the flower to give it some structure, and also to attach to a hair clip if you want.
Step 2
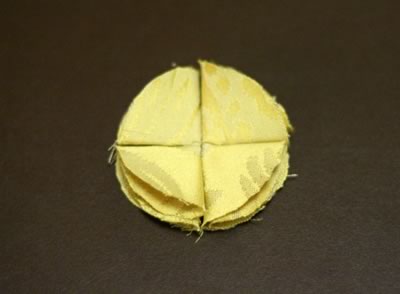
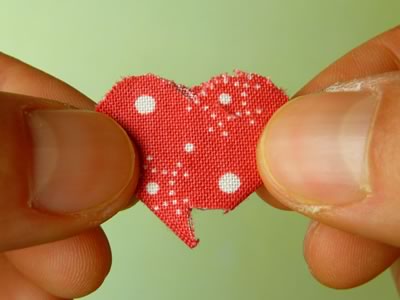
Take on of the big circles, and fold it in half three times. Trim the corners with a pair of scissors so that the folded up fabric looks a bit like an ice-cream.
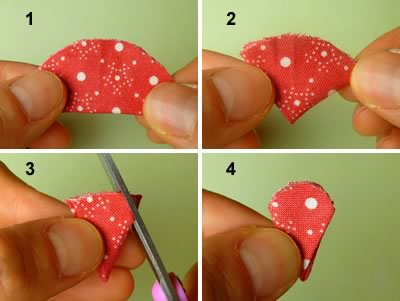
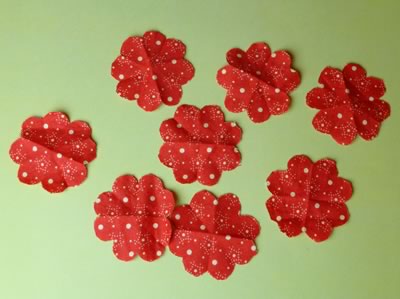
Step 3
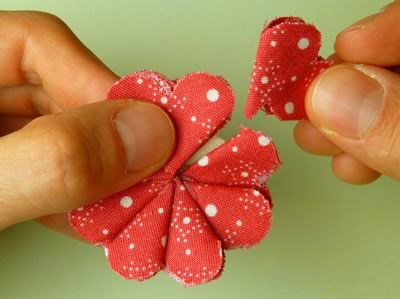
Do the same thing for all the other big circles, then unfold them. They should look something like this, with a wavy petal-like pattern around the edge.
Step 4
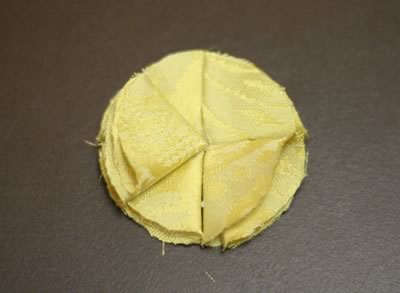
Take one of the big circles and fold it in half twice, along the same creases that are already in it from folding it a moment ago. This is now one of the petals of your flower. Put a tiny blob of hot glue on the corner of the petal. You don't need much glue.
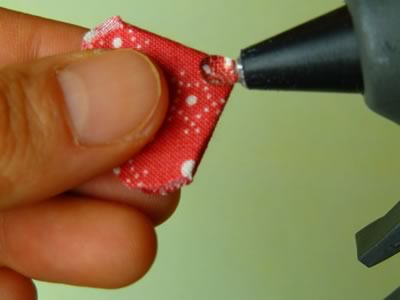
Press the petal onto the felt circle.
Step 5
Repeat step 4 with another petal, and glue it down on top of the first petal but offset by 45° (one eighth of a circle) to the right.
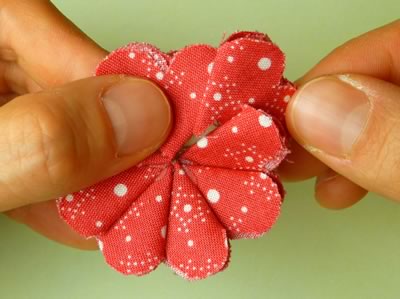
Keep adding more petals the same way, gluing each one 45° to the right of the one before, until you've added 7 petals in total. Don't add the last petal just yet . Your flower should look something like this.

Step 6
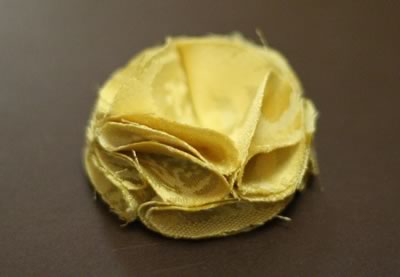
Take the last petal and cut out a little chunk like this. Cutting it like this will help us squeeze it in between the other petals.
Put a little blob of glue on the back of the petal, then slide it in so that it goes on top of the seventh petal (12-o-clock position in the photo), and under the first petal (3-o-clock position in the photo), like this.
Step 7
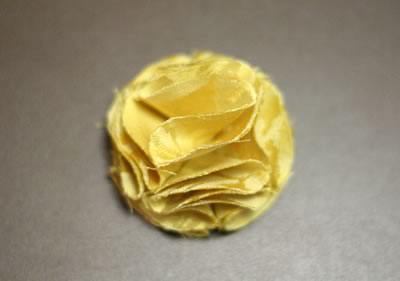
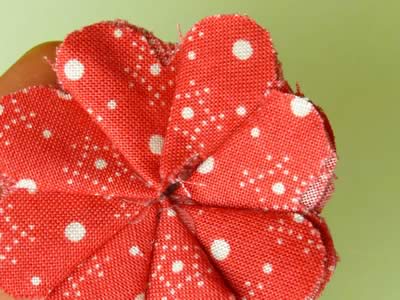
Glue a button or embellishment into the center of the flower to finish it off. You can also glue an alligator hair clip onto the back if you'd like to wear the flower in your hair.
Here's the finished flower:

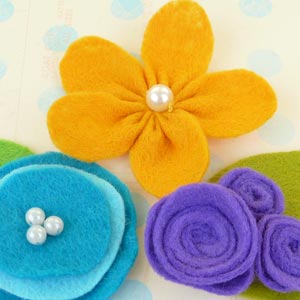
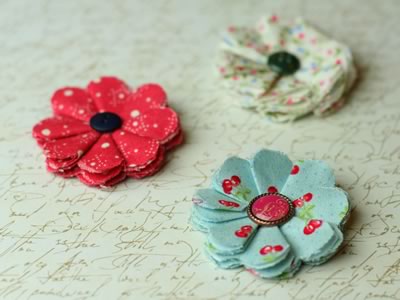
And a selection of other pinwheel flowers too.
I hope you enjoyed learning how to make fabric flowers! How did yours turn out? If you have questions or comments, or just want to say hi, then please contact me with this handy form .
Related Pages
You might also like...