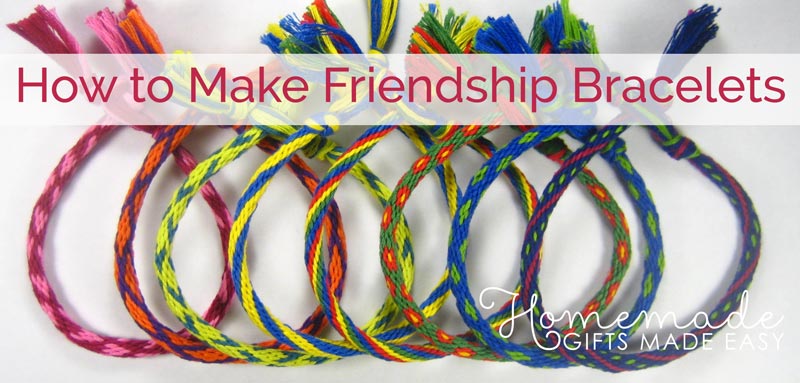
How to Make Friendship Bracelets
Anyone can learn how to make friendship bracelets with beautiful intricate patterns. Let me show you how, with easy step by step instructions. Which design would you like to make?
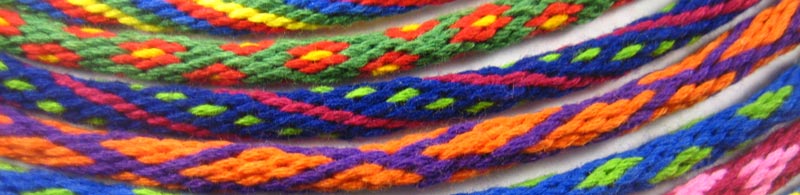
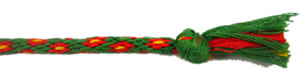
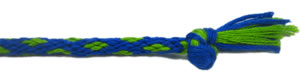
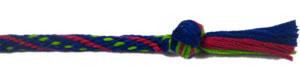
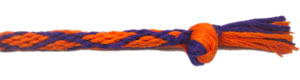
Even if you're a complete beginner, you can make a pretty bracelet like one of these:

It'll probably take you an hour or so to make your first bracelet. The technique is so easy that you can watch TV at the same time (seriously!).
To make the bracelets on this page you won't need to buy any books or special equipment. You'll be able to make best friend bracelets, heart bracelets and more with just the instructions on this page.
On this page, I'll show you how to make friendship bracelets in 8 different designs. The cool thing is that it's the exact same easy technique for all the different patterns. I'll show you what the technique is when we get to the instructions.
Friendship Bracelet Designs
Here are all 8 friendship bracelet patterns:
Hearts - great for Valentine's Day
Flowers
Diamonds
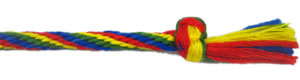
Rainbows
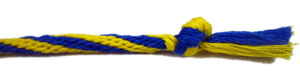
Stripes - great for sports team colors
Stripes and Dots
Chevrons
Checkered
The trick is something called a braiding disc, or braiding loom. It's just a round piece of cardboard with some slots in it, but it makes bracelet-weaving a lot easier. In the free friendship bracelet instructions below, I'll show you how to make your braiding disc and how to use it.
I'll start out with step-by-step photo instructions, but if you prefer you can also skip ahead to the video tutorial further down the page.
Ready to learn how to make friendship bracelets? First up, you'll need to gather your materials.
How to Make Friendship Bracelets: Materials
Before we get on to how to make friendship bracelets, you'll need to gather up a few materials. All you need is:
- embroidery floss - 16 strands*, each 20" (50 cm) long
- 1 piece of cardboard, e.g. breakfast cereal box
- pair of scissors
- glue
* How many strands you need in each color depends on the pattern (see step 2 of instructions below), but it's always 16 strands in total.
Embroidery floss is a loosely-twisted 6-strand thread. It comes in all colors of the rainbow, including fluorescent and metallic. You can buy it in stores that sewing supplies stores or craft stores. Usually it's sold by the "skein", which is a little bundle about 8 yards long.
Got your embroidery floss? Great! Let's get onto the fun part of learning how to make friendship bracelets.
How to Make Friendship Bracelets
Step-by-step photo instructions
The method for making the bracelet is the exact same regardless of what pattern you make. The only thing that's different for each pattern is the starting position of the threads. So even though I'm demonstrating with the chevron pattern below, you can follow along with whatever pattern you choose.
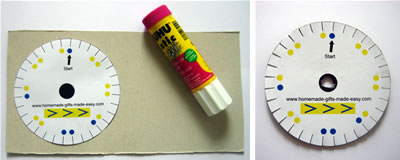
Step 1: Make Your Braiding Disc
Download and print one of my free braiding disk templates:
Template 1 - rainbows, checkers, stripes, stripes & dots
Template 2 - hearts, flowers, diamonds, chevrons
Choose the pattern you would like to make, and cut out the disc for that pattern. Glue to disc on to a piece of cardboard, then cut away the excess cardboard so you've just got the disc. Poke a hole through the black dot in the center, using a pen or pencil. Finally, cut along each of the black lines on the edge, so that the braiding disc has lots of slots around the edge.
Your braiding disc should look like the right-hand picture below.
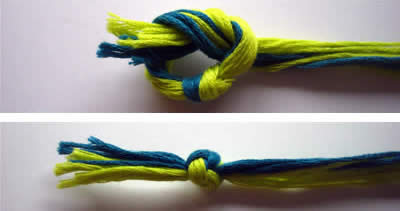
Step 2: Tie the First Knots
Gather up your embroidery floss. The braiding wheel shows you how many pieces you need of each color. For instance, the chevron braiding wheel (pic above) has 11 yellow dots and 5 blue dots on the wheel. So, I need 11 yellow pieces of floss and 5 blue pieces of floss. Each piece should be 20" (50 cm) long. Of course, you can substitute two different colors if you like.
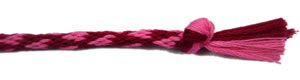
Line up all 16 pieces of floss together, and tie a simple overhand knot like this. Leave about 1" (2.5cm) loose ends poking out:
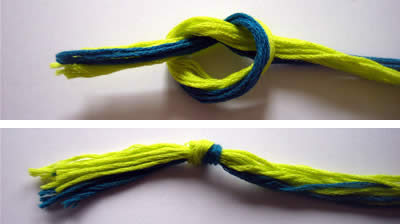
Then tie another knot directly on top of the first one, like this:
Step 3: Set Up Your Braiding Wheel
Poke the knotted end of the floss bundle through the hole in the center of the braiding disc, like this:
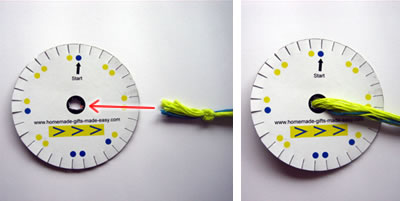
Then clip one piece of thread into each colored slot, matching the color of the floss to the color of the slot. Your braiding disc should look something like this:
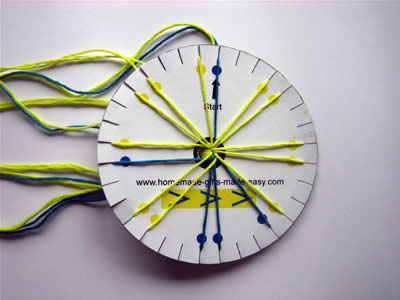
The initial pattern of threads on the braiding disc is the only thing that sets the pattern you get on the bracelet. So from this point on, the method for how to make friendship bracelets is the exact same regardless of the pattern.
Step 4: Braid Your Friendship Bracelet
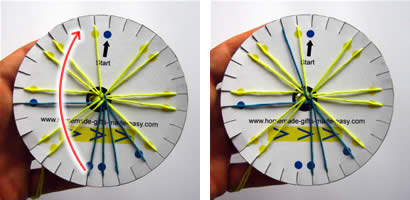
Braiding your bracelet with the disc is really easy. There are just three steps to learn and repeat. Begin by holding your braiding disc so that the "start" arrow is pointing up.
- Step A:
-
See how there are two threads at the very top of the wheel? Un-clip the right-hand thread*, and clip it into the slot just to the right of the two threads at the bottom:
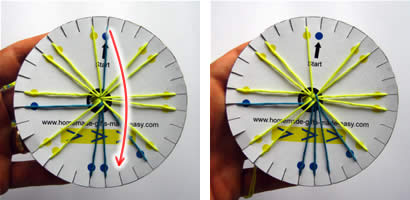
* At the very beginning of your bracelet, the "start" slot will show you which thread to unclip. But later on, the position of the start slot doesn't matter.
- Step B:
-
Now there are three threads next to each other at the bottom. Un-clip the left of the three, and clip it in just to the left of the thread at the top:
- Step C:
-
Rotate the whole disk to the left, so that the next pair of threads is at the top:
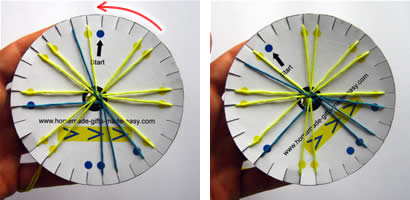
Now, just keep repeating Step A, Step B, Step C etc, and your bracelet will grow. For instance, the next step in the sequence would be Step A again, like this:
There's also a video tutorial further down the page, if you're finding it a bit tricky following the pictures.
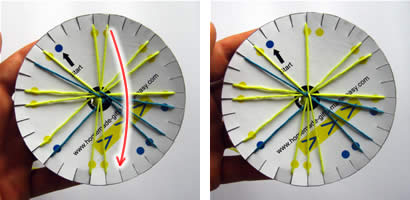
Step 5: Keep on Braiding
Keep on braiding, and after a while you will notice the bracelet growing down through the hole in the center of your braiding wheel, like this:
Every now and then, comb the loose ends of floss with your fingers to stop them from tangling. Also, give the bracelet a bit of a tug to stretch it - it might turn out to be longer than you think!
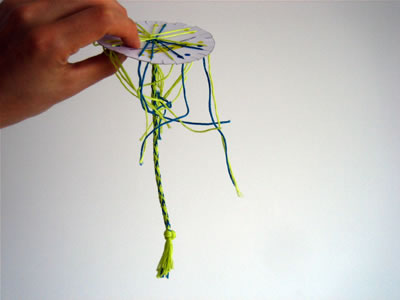
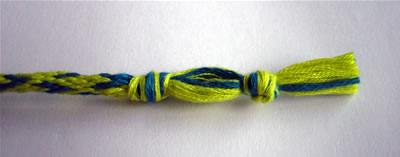
Step 6: Tie Finishing Knots
Once the bracelet is long enough to go around your wrist, un-clip it from the braiding wheel. Finish it off by tying two knots next to each other, about 1/2" (1cm) apart, like this:
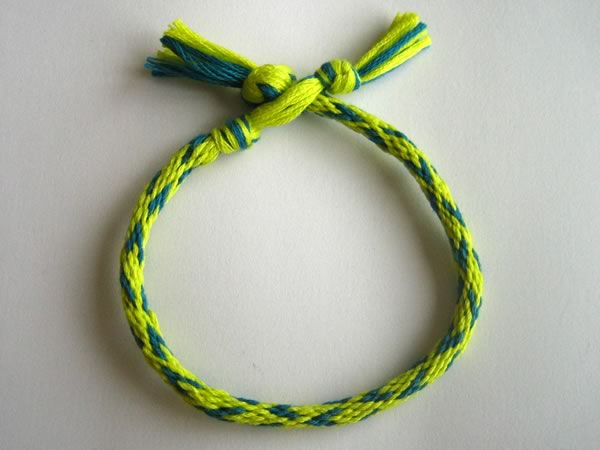
Step 7: Wear Your Bracelet
Congratulations on finishing your bracelet! To wear it, you poke the big knot at one end through the gap between the two knots at the other end, like this:

How did yours turn out? I hope you enjoyed learning how to make friendship bracelets with this method.
How to Make Friendship Bracelets
Video Tutorial
Click the white arrow in the center to play.
If the video keeps stopping and starting, then the best thing to do is pause it and come back in a few minutes when it's fully loaded. Or, just follow my photo instructions instead.
From the days of the Samurai...
Believe it or not, the method I just showed you for how to make friendship bracelets dates from the Samurai era in Japan. It's called "kumihimo" , which means "union of threads". Samurai warriors used kumihimo cords to tie on their armor. (The cords they used probably they didn't have little hearts and flowers though :-)
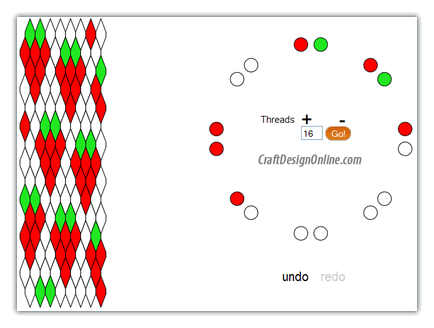
Design Your Own Friendship Bracelet Patterns
Now that you know how to make friendship bracelets, you can have fun designing your own patterns. This free online bracelet designer makes it easy. It's what I used to design the patterns I showed you on this page.
Here's a strawberry friendship bracelet pattern designed by Marga - thanks for sending in your photo Marga!
 Strawberry pattern friendship bracelet
 Braiding wheel pattern for strawberry friendship bracelet
Created with this free online tool
Planning on making lots of them?
Personally, I've found that cardboard braiding wheels work just fine, but they can get a bit wonky and bent after a while. If you're planning to make lots of bracelets, it might be worth investing in a proper braiding wheel, which is made from durable foam. On Amazon, you can find Kumihimo starter kits which usually come with a braiding wheel, some floss, and instructions.
You might also like...
Here are some other pages I think you might enjoy:
Make a Friendship Bracelet from Yarn
Paracord Survival Bracelet
Make a Bead Bracelet with Memory Wire