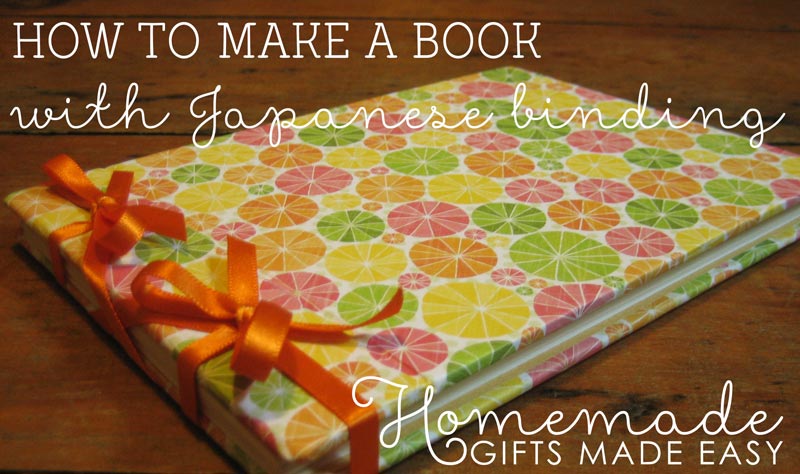
How to Make a Book
Learn how to make a book and bind it, using the simple "Japanese book binding technique" where a single ribbon holds the entire book together. A journal or photo album made this way makes a beautiful gift.
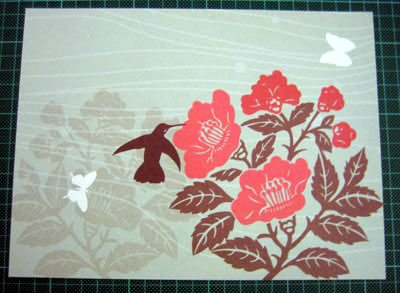
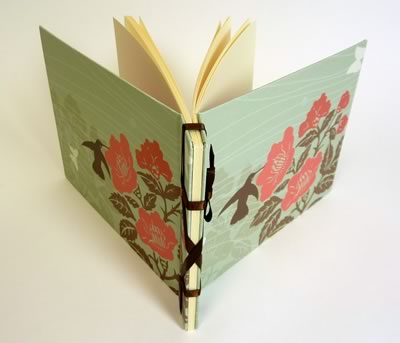
If you'd like to learn how to bind a book, then the Japanese bookbinding technique is one of the easiest ways to learn. You don't need any special equipment, and the finished result is really pretty. Here's one I made with a bird and flowers print:

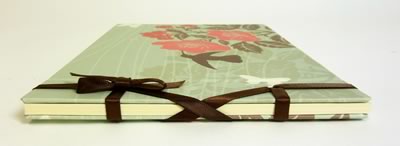
Here's a view of the binding:
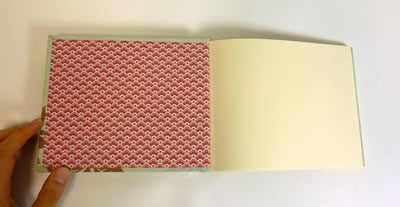
And here's the inside cover:
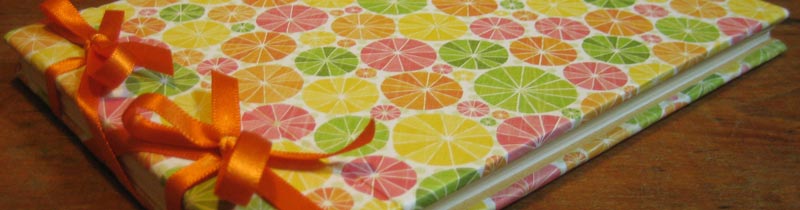
And here is a picture of another book I made with super cute paper. I love how bright and colourful it looks!
How to Make a Book - Materials
For this project, you will need:
- blank paper (30-100 sheets, depending how thick you want your book)
- cardboard or mountboard - 2 sheets, for front and back covers
- pretty paper* - 2 types, for inside and outside of covers
- ribbon - a few feet long, 6 mm (¼") wide
- hole-punch (or power drill: optional)
- glue stick
- scissors
- ruler
- bull clips
That's it! It's so much easier than conventional book-binding, because you don't need any special glues.
* I normally use scrapbooking paper, but reader Hannah wrote in to say that wrapping paper works well too - thanks for the tip Hannah!
How to Make a Book - Instructions
Step 1
Lay out your blank paper. Here I'm using 30 sheets of 6" by 8" high-quality writing paper. You can use as many or as few sheets as you like. I think 30 sheets is a good size for a photo album. For a journal you probably want 50 or more.
Step 2
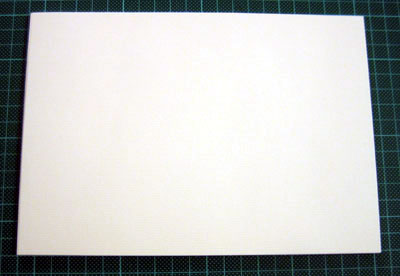
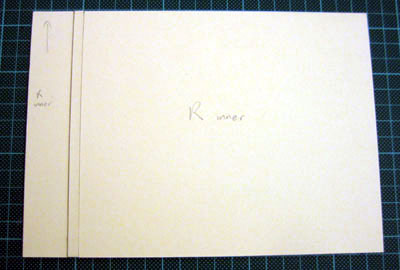
Cut out two sheets of cardboard exactly the same size as your blank paper, e.g. 6" by 8" in my case. Take one of the cardboard pieces and draw two vertical lines on it. The first line should be 1" (2.5cm) from the left edge, and the second line should be just under 1 ½" (exactly 3.5cm) from the left edge.
Repeat for the other piece of cardboard.
Step 3
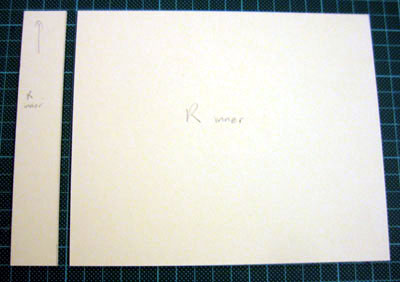
Using scissors or a craft knife, cut along the lines you drew in the previous step. You basically end up removing a thin (just under ½" , or exactly 1 cm) strip from each piece of cardboard.
Step 4
Cut out two pieces of nice paper for the outside of the covers. Each piece should be 1 ½" longer and 1 ½" wider than the blank paper. For instance, my blank paper is 6" by 8", so I cut my nice paper to 7 ½" by 9 ½" size.
Step 5
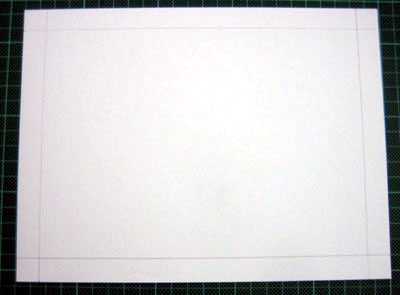
Place one of your nice sheets of paper face-down, and draw a ¾" border in pencil all the way around.
Step 6
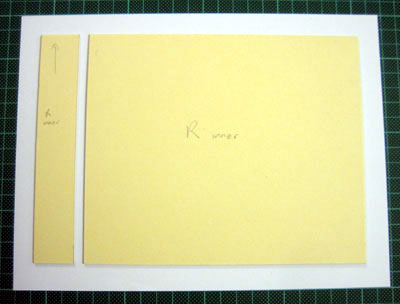
Use your glue stick to glue the cardboard onto the nice paper like this, so that it lines up with the border you drew in the previous step. Make sure that you cover the whole face of cardboard with glue, not just the edges.
This will be the back cover. The gap in the cardboard will be the "hinge" that makes the book easy to open.
If you're using thin paper (e.g. wrapping paper), it's better to apply the glue to the paper than to the cardboard, otherwise the paper can wrinkle up. Thin paper tends to swell from the moisture in the glue. By applying the glue direct to the paper, you give the paper a chance to swell before it's in contact with the cardboard.
Step 7
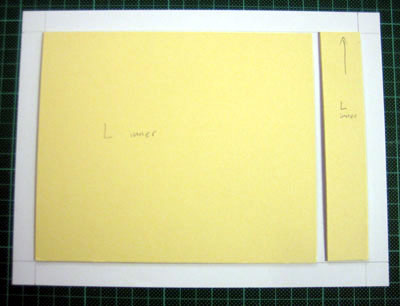
Do the same thing for the front cover. Make sure that you glue the paper on the right way up! My paper has a little bird on it, so I had to make sure it was the right way up.
Step 8
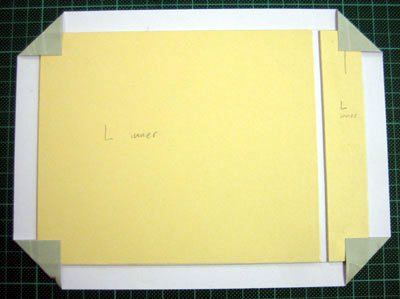
Fold the corners over as far as they'll go, and glue them in place.

Step 9
Do the same for the other cover.
Step 10
Fold the edges in, and glue them in place too.
Step 11
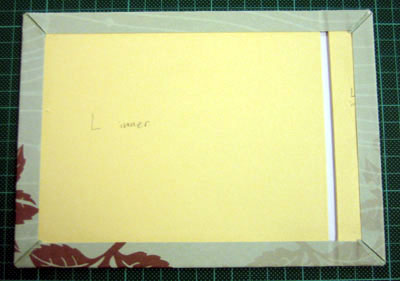
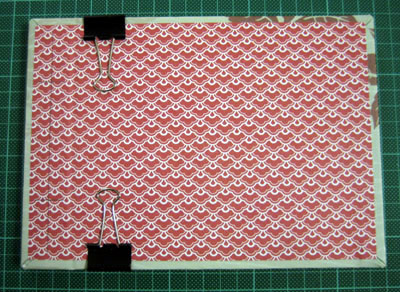
Cut out two sheets of paper for the inside of the covers. I'm using this red paper with a fan pattern. The pieces should be ½" smaller than the blank paper. My blank paper is 6" by 8", so I cut out the paper for the inside-covers to be 5 ½" by 7 ½".
Then, glue the paper onto the inside of the covers. (Ignore the bull-clips, they're actually for the next step.)
Step 12
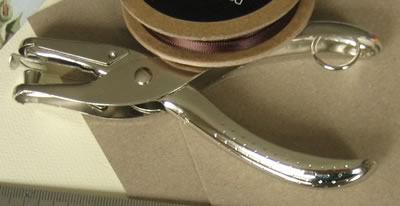
Time to punch the holes, which is probably the trickiest bit of how to make a book, but not too difficult to do.
If you are lucky enough to have access to a heavy duty hole punch, you'll have no trouble punching through your covers and pages of the album. This is the most straightforward method of making your holes, and will only take you a few minutes as you can do many pages at once.
If you don't have access to a heavy duty hole punch, try using a single-hole punch like one of these below. It really depends on the thickness of the cardboard cover as to whether you can punch through it or not, but its worth a try. If you use a single punch, punch through the covers and sheets one by one.
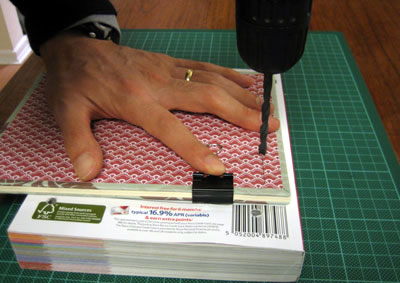
What if I don't have a heavy duty paper punch?
Don't worry! Another option is to use a drill. If you have a drill, then make a "sandwich" that goes cover, blank paper, cover, but with the covers on inside out. When we drill in a moment it usually makes rough edges at the top and bottom of the sandwich. By drilling with the covers on inside out, the rough edges will be hidden when you flip the covers around the right way later.
Use bull-clips to hold the sandwich together, then rest it on an old phone book or something that you don't mind drilling a hole in. Drill two holes. One of them should be 1 ½" from the top of the book, and the other should be 1 ½" from the bottom of the book. They should both be about ½" in from the spine.
I used a ¼" drill bit. Smaller is OK too (e.g. 3/16").
Step 13
Now it's time to do the actual binding, which is the really clever part of the Japanese way of how to make a book.
You'll need a piece of ribbon that's 6 times as long as the book is tall. For instance, my book is 6" tall, so I need about 36" of ribbon.
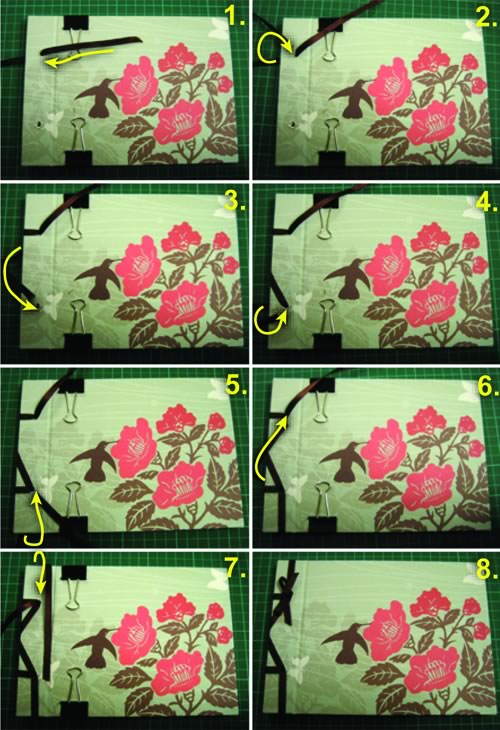
Here's a video showing how to do the binding:
Just in case you can't play the video, here's a step-by-step series of pictures showing you how to do the binding.
How to Make a Book: Finished!
Here's the finished book:
Well done on learning how to make a book! How did yours turn out? I hope you found my instructions clear. If you have any comments or suggestions, or just want to say hi, then please contact me with this handy form .
Your homemade books...
Below are some gorgeous photos from visitors who learned how to make a book from this page. Thanks for sending in your pics!
"Here are a few images of my first Japanese binding. Thanks for the inspiration!"
~ Hien
Photos from Hien
"I had lots of fun making a journal/notepad, in fact, I liked it so much I decided to make 2 and I think I will make more..."
~ Lauren
Photos from Lauren
"I tried the book/japanese binding as a present for my friend's birthday. I changed it around a bit, though. Instead of making one cover, I made two and I made it so you can flip it so either sides can be the front. That's also why the cover is upsidedown and the other is rightside up. Also, the bow instead of being on the front, I put it on the side. Anyways, I just wanted to say it was a really fun project"
~ Leanna

Photos from Leanna
"I wanted to say that I absolutely love this book tutorial. Thank you very much!"
~ Molly
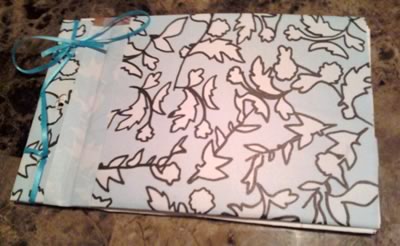
Photo from Molly
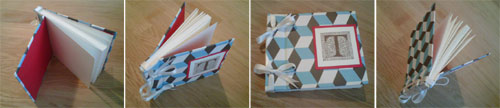
"I wanted to thank you so much for your great tutorial on how to make a book with Japanese binding! It helped me a lot and I actually made one for my best friend's birthday. My friend likes roses a lot, so my idea was to use 'blooming roses' paper for the front cover, and then 'leaves' for the back cover. The picture of the rose inside is made by my friend."
~ Mady
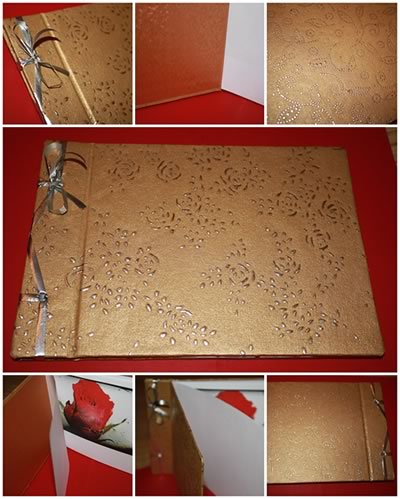
Photos from Mady
"Thank you so much for your awesome book tutorial! I just finished my first book and can't wait to get started on another one! I think I'm hooked!"
~
Rachel
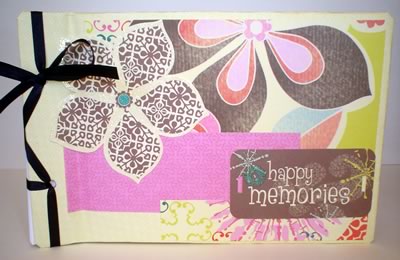
Photo from Rachel
"Thank you for such a great technique for how to make a book. I made it for my friend and received lots of compliments on it!
~ Sarthak
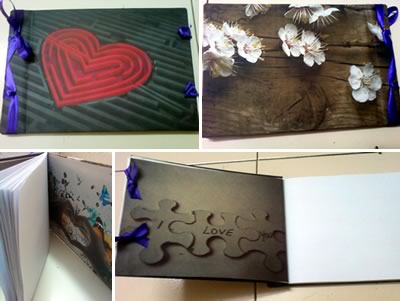
Photos from Sarthak
Thank you soooo much for sharing your instructions! I made 13 keepsake books for the Tri-Cities Area Faith in Action volunteers to show how much we appreciate their work.
~ Sarah
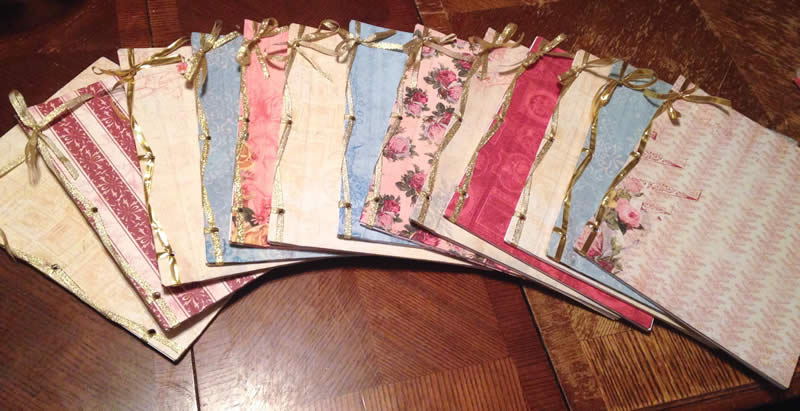
Homemade books by Sarah
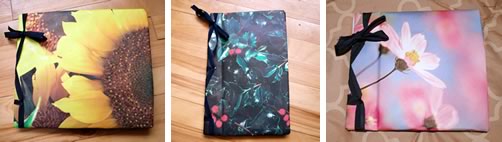
I made my boyfriend a book of 365 pages of things to remind him of me to last a year while we're apart. Your tutorial on Japanese book binding worked perfectly for my project, even on such a large book! Thanks for helping make such a special project come to life. I also added a bookmark by tying a ribbon in a square knot underneath the bow, and it works wonderfully!
~ Sophia
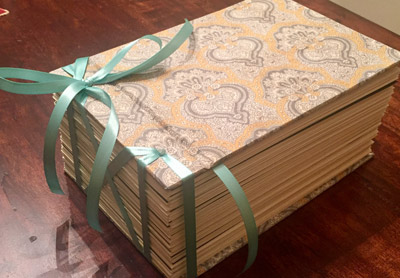
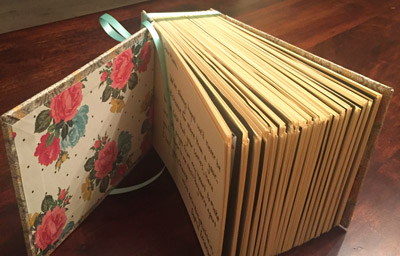 Homemade book by Sophia
You might also like...
I hope you enjoyed learning how to make a book. If you're looking for more gifts to sew or make, take a peek at these other easy homemade gift ideas. Go on, you know you want to!