How to Make Coasters the Right Way

WARNING: There is a tragic flaw with most of the "how to make coasters from ceramic tiles" instructions on the web. Can you guess what it is?
They're not waterproof! Seems silly, right? But it's true. I know, because I tried them. The ceramic tile coasters that I crafted looked great initially, but very quickly got tea and coffee stains on them that wouldn't wipe off. Not being waterproof is a pretty serious problem for a coaster!
I tried all sorts of things to make the coasters waterproof. On my third or fourth attempt I finally figured out how to make coasters that were immune to tea and coffee drips. I'll share the secret with you on this page so you can learn how to make coasters that are beautiful, durable, and fully waterproof. It's actually pretty simple once you know how.
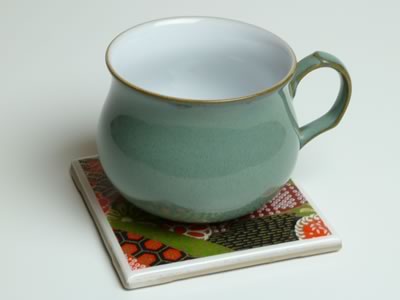
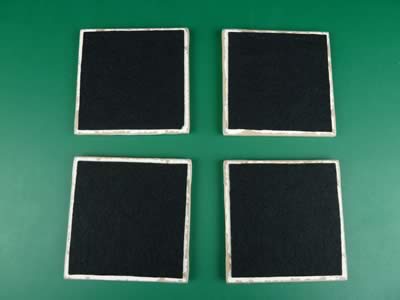
Here's a close-up. You can see the glossy, waterproof finish.

I'll show you how to make coasters in batches of four, though obviously you can make as many or few as you like.
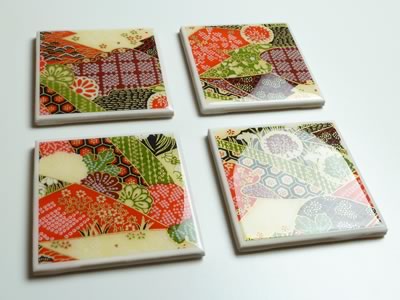

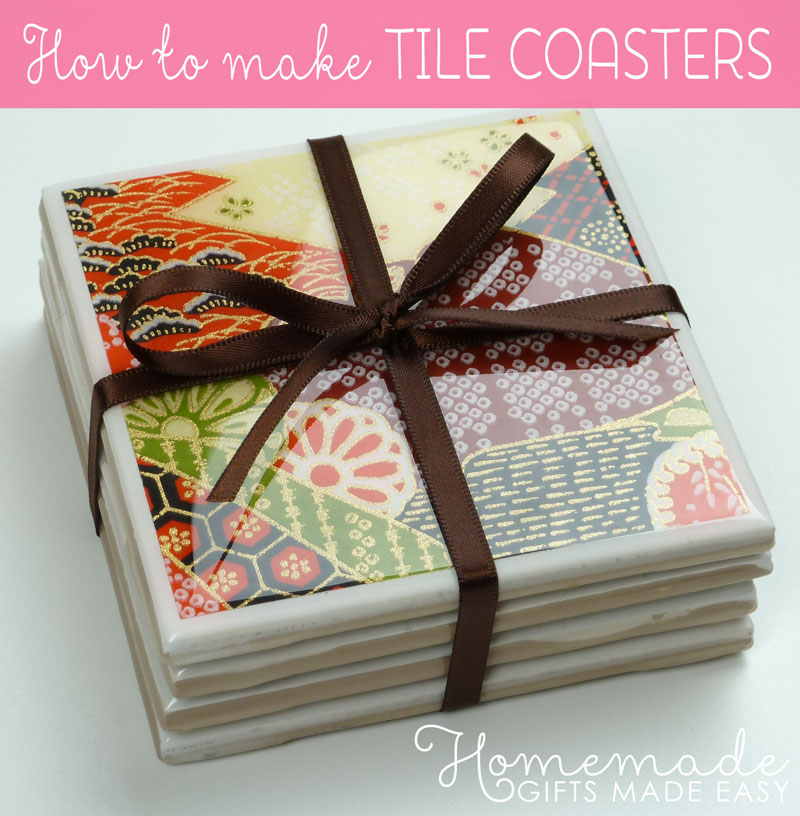
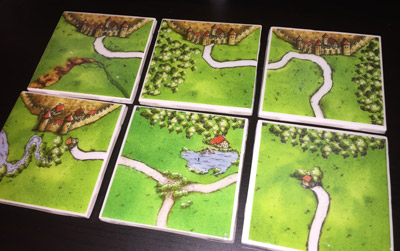
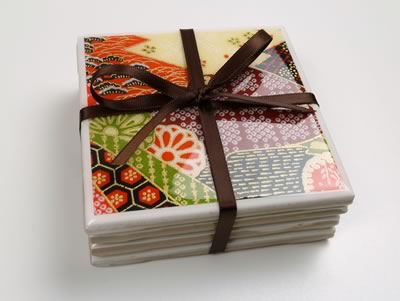
I think they make really lovely gifts. I gave this set to my mom for Christmas which I made using some beautiful Japanese paper.
And here's a gratuitous photo of my DIY ceramic tile craft coaster with one of my favorite Denby teacups.
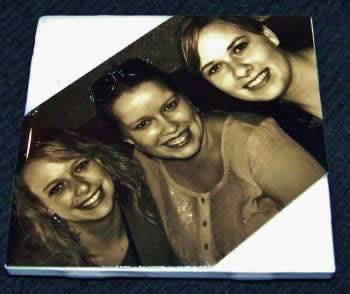
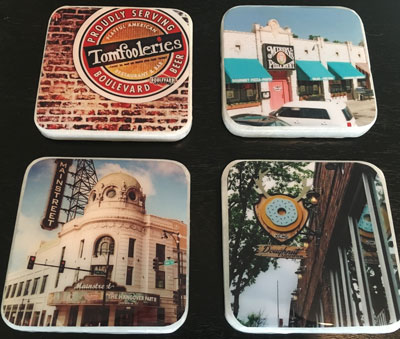
If you're wondering how to make coasters with photos, you can use the exact same method. Here's one made by reader Shelbie (thanks for sending in the pic Shelbie!).
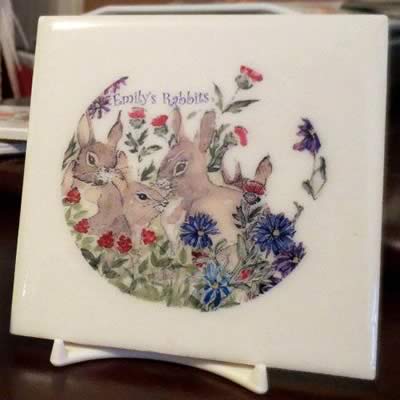
Here's a beautiful tile by artist Judy Blasdell. She printed her design on a water slide decal and then varnished using the method I'll show you on this page.
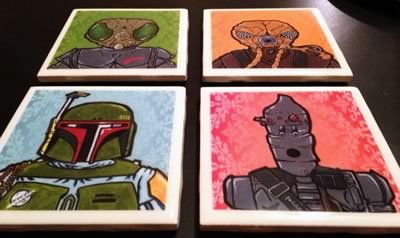
Here's an awesome set coasters featuring Star Wars bounty hunters, by Jason from Drexninestudios. The artwork was hand-painted, scanned, given a digital background in post-production, then printed and glued onto the tiles using the method on this page.
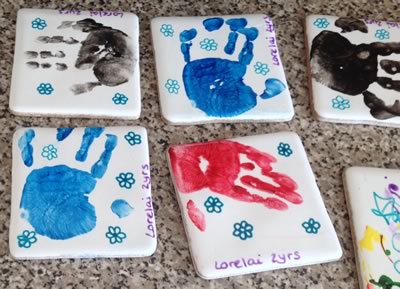
Sometimes I get asked how to make coasters by directly hand-painting on them, so here's how: You can paint on your tiles using special oven-bake ceramic paint like the Pebeo Vitrea paints, bake them (using the instructions that come with the paint), and then coat the tiles with envirotex like I describe on the rest of page. Check out these adorable hand-print tiles made by reader Felicity and her two-year-old daughter. Thanks Felicity for sharing your photo and the way you made your coasters!
You can also hang your coasters on the wall as wall art. Here are some brilliant motivational wall coasters made by reader Joann. Thanks for sharing your photos Joann!

Reader Staci made coasters as an anniversary gift for her boyfriend with photos of their favorite places in Kansas City. What a cool idea! Thanks for sharing your photo Staci!
Reader Sarah made these gorgeous coasters with a fairytale castle design. Thanks for sharing your photo Sarah!
This is a long page, but don't let that frighten you. Learning how to make tile coasters is actually really easy. The only reason the page is long is because I've divided the tutorial up into small steps and included lots of photos.
How to Make Coasters: Materials
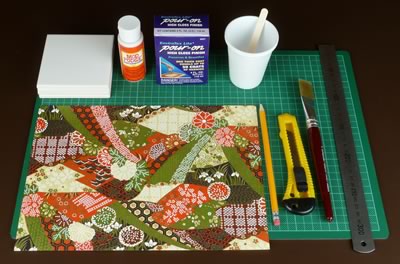
The first step in learning how to make coasters is to gather up your materials. Here's what you'll need...
Materials for tiles and decorating them
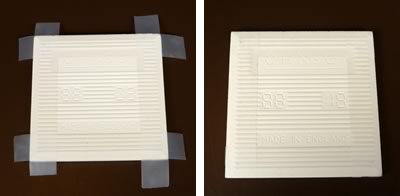
- 4 tiles each 4" (10 cm) square
- Mod Podge or other white craft glue
- Paint brush for spreading glue
- Scrapbook paper*
- Pencil
- Craft knife
- Ruler
You can find tiles at DIY stores like Home Depot - you can even buy tiles online . (Thanks to reader Lisa for the Home Depot link!)
For the glue, I recommend using Mod Podge or another reputable brand. I've tried using cheap white glues in the past, and some of them turn brown over time, which is heartbreaking after you put a lot of work into a project.
*Instead of using scrapbooking paper, you could use photos (print them 4x4") to make your own custom photo coasters. Or, you could use sheet music from a favorite piece, pages of a classic novel, botanical illustrations or other illustrations from books/novels, you own sketches or drawings (or children's), postage stamps, tickets from events you've attended, postcards, sections of maps, candy wrappers, etc...
Special materials for making Photo Tile Coasters
Tile coasters look awesome using photos instead of craft paper, but there are some special tips to make them turn out right.
If you print your photos at home using an inkjet printer, then you need to use a different glue instead of Mod Podge. The Mod Podge is water based and makes inkjet-printed photos run. So, instead of using Mod Podge, I'd recommend using a special glue designed specifically for inkjet prints. One glue that works well is "Annie Howes Glamour Seal", or else you can use a clear spray acrylic sealer that you can purchase from a craft store or hardware store.
If you get your photos printed at a photo print shop (e.g. Kinkos) then the instructions on this page work just fine without any modifications. Some print shops will let you print 4x4" prints, which fit perfectly on a tile (thank you Theresa for this tip!)
Materials for varnishing and waterproofing the tiles
Achieving a waterproof and non-tacky finish is the most critical part of how to make coasters in my opinion. Here's what you'll need:
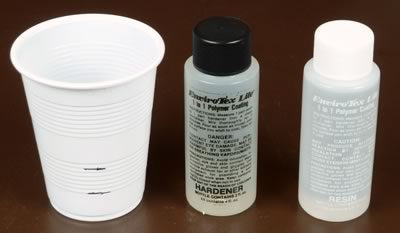
- Envirotex Lite Pour-On High Gloss Resin
- Two disposable plastic cups
- Wooden stirring stick (e.g. popsicle stick)
The Envirotex is the secret of how to make coasters with a beautiful, glass-like, non-tacky*, stain-proof finish. It's a two-part epoxy that comes in two bottles which you mix together then pour on your coasters. People use it to coat bar-tops in bars and restaurants so it's designed to be durable. One coat of Envirotex is equivalent to 50 coats of regular varnish. If you want to make a gift that will last for years, then it's worth using.
The cured envirotex feels completely smooth and non-tacky to your fingers, and is 100% waterproof. The only thing that's not perfect about it is that it does stick a little bit to a hot coffee cup. Having said that, it's still much less tacky than any other finish I've tried in my experiments of how to make coasters.
Before I discovered Envirotex I tried practically every other type of varnish (including acrylic varnish, decoupage varnish, spray-on polyurethane varnish, araldite, egg whites, and mod-podge), and nothing gave as good a finish. The other types of varnish looked OK, but they were tacky, or brittle, or got stained by coffee or tea.
I haven't seen Envirotex in many craft stores, but you can get it at Amazon (link above) or on eBay. Some readers have said they've also spotted it in their local Michaels and Hobby Lobby craft stores. An 8-oz kit (enough for 16 tiles) normally costs around $15, so it comes out at less than $1 / coaster. And obviously it's cheaper per tile if you buy it in bulk.
OK, now you've got your materials, let's get onto the fun bit of how to make coasters :-)
How to Make Coasters: Video Instructions
I found this video (not my own) that does a great job of explaining how to make coasters and coat them with Envirotex. Actually it describes how to make placemats, but the process for coasters is almost identical.
If you have a slow internet connection you may prefer to follow my written instructions below instead.
How to Make Coasters: Decorating
Step 1
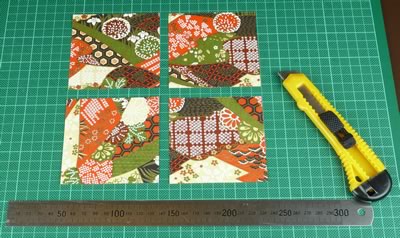
Cut out squares of scrapbooking paper (or photos) to decorate your coasters. My tiles are 4" across, so I cut out pieces of scrapbooking paper 3.5" across, to leave a small border around the edge.
Step 2
Make sure your tiles are clean and dry. If they're greasy, then give them a wipe with methylated spirits or rubbing alcohol to clean them.
Completely paint the blank side of a decorative paper square with Mod Podge or white glue. Make sure you go right up to the edges. It's best to work on a piece of scrap paper that you don't mind getting glue on.
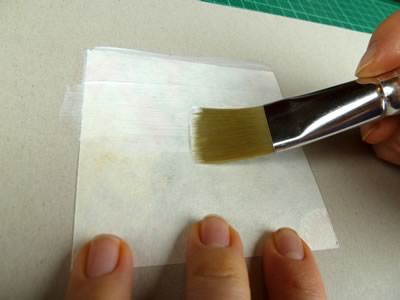
Place the glued piece of decorative paper onto a tile. Press on it firmly to remove any air bubbles. I recommend using a glass tumbler as a rolling pin and using a rolling motion from the center to the edge of the paper to work out any bubbles. The first time I did this I just used my fingers and even though I thought I was thorough I still left some bubbles under the paper which I only noticed once the glue was dry.

Repeat the process for the rest of the tiles. Have a cup of tea and a biscuit and wait 15 minutes for the glue to dry before going on to the next step.
Step 3
Check for any bubbles under the paper. If you see any, pop them with a pin and flatten them out.
Brush a layer of Mod Podge or white glue over the top of the decorative paper. I like to brush all in the same direction.
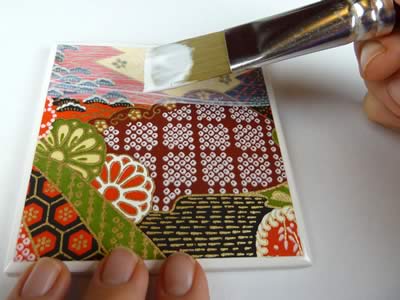
Wait until the glue dries clear (about 15 minutes), then paint on another layer, this time at right-angles to the first layer. It's really important that you completely seal over the paper with glue, so that later the varnish doesn't soak into the paper and discolor it.
Leave glue to dry overnight, so that it's completely dry before you apply the varnish in the next step.
Don't worry if the dried glue has a ridged surface texture from the brush strokes. When you varnish the coasters it will create a beautifully smooth surface and you won't see the ridges any more.
How to Make Coasters: Waterproofing
I strongly recommend varnishing your tiles to make them waterproof. If you leave them unvarnished then they'll look OK, but they'll always have a slightly tacky (sticky) feel to them, and will stick to a hot cup placed on them. Also they'll stain if tea or coffee gets on them. Varnishing your tiles with Envirotex will give them a glass-like waterproof finish which I think is really worth it.
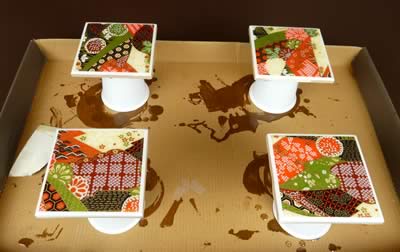
Mind you, the Envirotex epoxy varnish is going to drip everywhere when you pour it on your coasters, so before you start it's a good idea to:
- work on a disposable surface like a big piece of cardboard or several layers of newspaper
- place each of your coasters on top of a disposable cup, to prevent them getting stuck to your work surface
- put on some rubber gloves, because it's unhealthy to get epoxy on your skin
The Envirotex smells a bit so you might want to work in a room with an open window. It not anywhere near as stinky as spray-on varnish though, which was something else I tried (but wasn't happy with the results of) along the way in my quest for how to make coasters waterproof.
Step 1
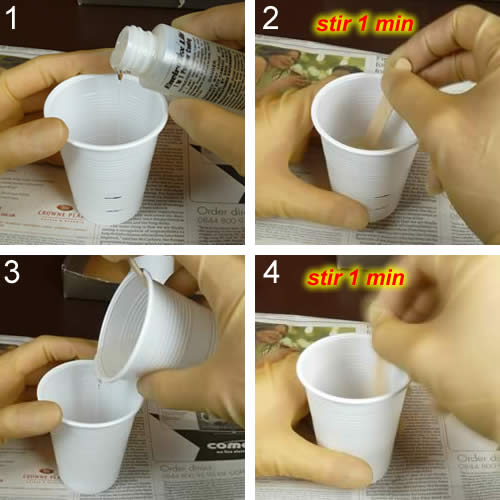
Mark lines at 1oz and 2oz (30 mL and 60 mL) on one of your disposable plastic cups. That's assuming you're making 4 coasters, each 4" square. If you're making more or less, you'll need to follow the instructions on the Envirotex package for how much you'll need.
The way I marked the lines was to put exact amounts of water into the cup (using digital scales) and mark the level with a Sharpie marker. You could also use measuring spoons to measure out the water. Make sure you completely dry the cup afterwards.
Another option is to buy disposable measuring cups that already have measuring lines marked on them, but I figured I could just as easily make my own for cheaper.
Step 2
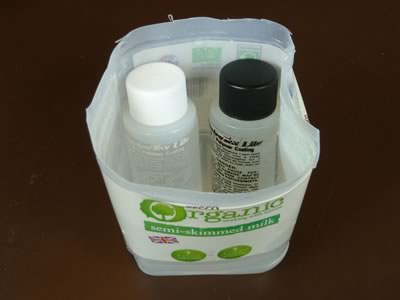
Put the Envirotex bottles in a bath of warm (not hot) water to heat up.
While the bottles are warming up, cover the edges of the base of your tiles with adhesive tape, and trim any excess. This will make it easy to remove any drips of Envirotex later.
Step 3
Pour 1oz (30 mL) from each Envirotex bottle into your measuring cup. Stir for 1 minute using a wooden paddle. After 1 minute, pour the mix into your 2nd cup, and stir for another minute. It's important to use two cups like this, because it leaves behind the unmixed epoxy on the sides of the first cup.
When stirring, you want to stir fast enough to mix the resin, but don't stir so vigorously that you make bubbles .
Step 4
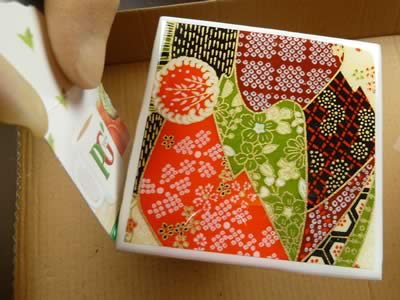
As soon as you've finished mixing the Envirotex, pour it onto the center of your coasters. Try to divide it evenly between all four. Notice how each coaster is balanced on top of a disposable cup to prevent it getting glued to the work surface.

The Envirotex will form spreading puddles on each tile and start dripping over the sides. Don't worry about the drips, they're a normal part of the process.
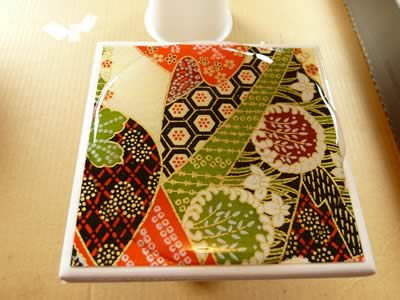
You want the Envirotex to completely cover each tile, so if it doesn't quite reach into the corners then use a scrap of cardboard to help spread it.
Also use a scrap of cardboard to make sure that the Envirotex completely covers the sides of each tile.
Step 5
About 15 minutes after you poured the Envirotex, you will notice tiny bubbles rising to the surface. Breathe gently over the surface of each tile to pop the bubbles. If you're nervous about putting your face too close to the tiles then you can breathe on them through a straw. Alternatively, you can use a blow torch or heat gun (just don't put them too close to the coaster or you'll burn the Envirotex!).
Step 6
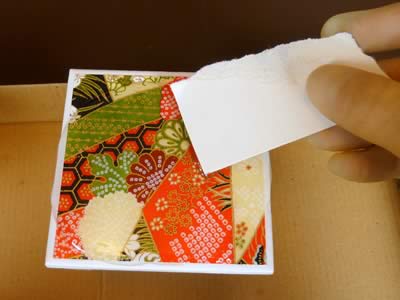
About 30 minutes after you poured the Envirotex, use a scrap of cardboard to wipe any drips from the bottom of the tiles. Wait another 30 minutes, and wipe away the drips again. By this stage you will have drips of Envirotex epoxy all over your work surface. I hope you protected it with newspaper or cardboard!
Cover your project with something (e.g. big cardboard box) to prevent dust landing on the coasters, and let the Envirotex cure for 24 hours.
Update: I've been told that after the initial 24 hr set you can bake the epoxy in the oven at 175 °F (80 °C) for 2-3 hrs to help it really set rock solid, but I haven't tried this myself. Another reader told me that they tried it but it made their tiles lose their gloss. If you try it, please let me know how it works for you (in the comments )
Step 7
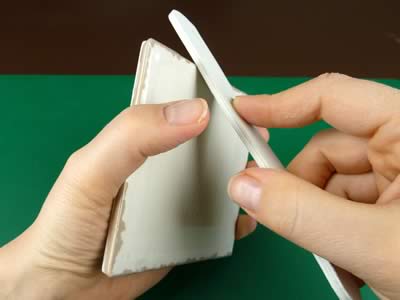
Once the Envirotex has set, peel the adhesive tape (which will be covered in drips of Envirotex) off the bottom of the coasters.
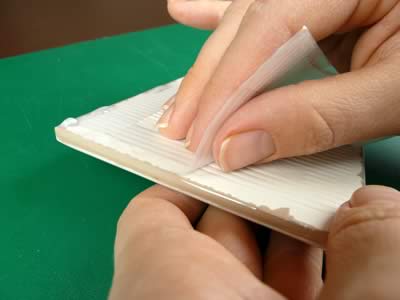
If it's hard to remove the tape, you might need to first file the bottom edges of the tile with a nail file or sandpaper.
If there are imperfections on the surface of the Envirotex (e.g. areas that somehow got missed), then you can "rescue" the project by pouring on a second coating of Envirotex.
Step 8
As a final touch, attach felt squares to the bottom of your coasters with glue or double sided tape. Some craft stores even sell adhesive-backed felt which makes it super easy. You could also use cork-board instead of felt.
Finished!
Here are the finished coasters, ready to be given as a gift! The Envirotex coating cures to full strength and toughness about 72 hours (3 days) after pouring, at 70 degrees F (21 °C). After this time the coasters are ready to use. The cure time is slower at lower temperatures.
I hope you enjoyed learning how to make coasters and that you found my instructions clear. If you have any questions or comments, or just want to say hi, then please contact me with this handy form .
FAQ: Frequently Asked Questions
Many people learning how to make coasters have asked me these questions...
Q: Is the Envirotex waterproof?
A: Yes, it's completely waterproof. It sets like a clear hard plastic.
Q: Is the Envirotex heatproof?
A: It's fine to put a hot cup of tea of coffee on it, but not a pot from the stove.
Q:Is the Envirotex scratch-proof?
A: Sort of. It's like a clear, hard plastic, so it will get tiny scratches over time.
Q: Will a hot cup of tea stick to the Envirotex?
A: Unfortunately yes, it will, just a little bit. But much less than any other varnish, coating, mod-podge etc that I've tried. If anyone figures out a better option then
let me know
!
Other People Also Like...
In a rush? You might like our easy-to-make printable gifts. Personalize and print at home in no time at all!