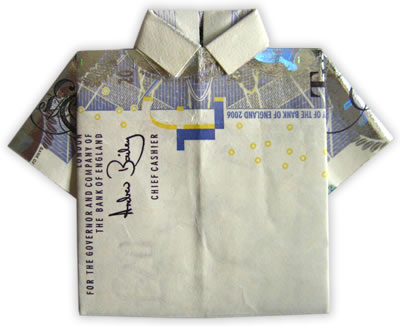
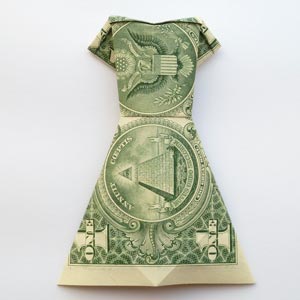
Money Origami Shirt Instructions
How-To Video and Photos

money origami shirt

Fold a Money Origami Shirt with my easy step-by-step instructions. A money shirt makes a cute way to give a cash gift or leave a tip :-)

Here I'll show you the easiest way I've found of folding a dollar bill shirt. There are a few different ways I've seen, and this one is the most straightforward.

I'll show you the video tutorial first. But further down the page there are also step-by-step photo instructions . They'll be useful if you that have a slow internet connection, they'll load much faster than the video.

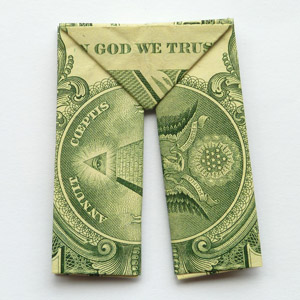
You can also fold an origami shirt out of regular paper - just start with a sheet of paper that's about twice as long as it is wide. I've seen people make some really neat homemade Father's Day cards with a folded paper shirt on the front. And we've got lots of great father's day quotes, messages, and poems to help you write a great card to your Dad.


Money Origami Shirt Video Tutorial

Click the white arrow in the center to play.

(If the video doesn't display, you might need to download the free Adobe flash player .)

If the video keeps stopping and starting, then the best thing to do is pause it and come back in a few minutes when it's fully loaded. Or, just skip to the photo instructions below.


Money Origami Shirt Photo Instructions

The same instructions as in the video tutorial... included here for those of you that don't have such a speedy internet connection.

I'll show you the folding with a white sheet of paper instead of a dollar bill so that you can see the folds more clearly. I've drawn in all the folds as red dotted lines to make them clear, and I've also shown close-ups of details.

Step 1:

Fold the bottom edge up, so that the crease is about 1/3 of the way up the bill.

money origam shirt step 1

Step 2:

Turn over the bill. The end closer to you should be the doubled over section. Make a crease down the center lengthwise. Then fold in the sides to meet the center line.

money origami shirt step 2

Step 3:

Now we'll make the sleeves of the shirt. Fold the bottom two corners outward like I've shown with the dotted red lines. Don't worry about the precise angle. The right-hand panel shows a close-up of what it should look like once you've made the folds.

money origami shirt step 3

Step 4:

Turn over the bill again. Fold the top edge down about 1/4" (about 1/2 cm), like I've shown with the dotted red line. The right-hand panel is a close-up of what it should look like.

money origami shirt step 4

Step 5:

Turn over the bill again. Now we'll make the collar of the shirt. Fold the top two corners in diagonally, like I've shown with the dotted red line. The precise angle doesn't matter, so long as the corners meet the center-line.

money origami shirt step 5

Step 6:

Fold up the bottom edge and tuck it under the collar.

money origami shirt step 6

Finished!

How did your money origami shirt turn out? I hope you found my instructions clear. If you have any comments or suggestions or just want to say hi, please contact me with this handy form .

money origami shirt finished


Origami Shirt Gift Ideas

As a Wedding Present

Check out this fantastic wedding present that someone made using the shirt and heart origami instructions from our site. How creative!

For a grandson

Reader Mary shares her story:

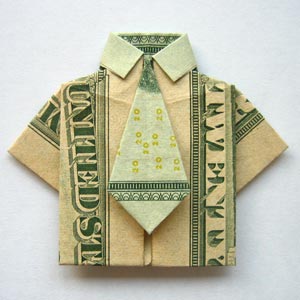
"I wanted to share this gift I made with you since it was your section on Origami that gave me the idea. My oldest grandson will be 13 in Jan and it's always a challenge to think of a gift for a boy that age. We were going to give him a gift certificate until I took your suggestion that cash would be better.

"I took a one dollar bill and made the "shirt" which came out absolutely adorable. Then I made the " heart " using a $20.00 bill. He will be getting two cards. The first one says "Open me first" and on the front it reads, "We were going to buy you clothes..." On the inside I put the "Shirt" (I stuck it by using a tiny bit of poster putty on the back of it) and wrote "But we didn't know what style you like"

"Then on the next card I attached the "heart" and wrote, "So we decided to give you our HEART instead!!!" I think this will be a great hit with him. Thanks again for a great website with so many wonderful ideas and to all the readers who share theirs!""

~Mary Ruthven

Update: "I gave my grandson his present - he thought it was so cool and went around the room showing everyone! When he realized the heart was a $20.00, he was thrilled."


You might also like...

Here are some other pages I think you might enjoy:

Or have a browse through dollar origami books on Amazon.com

We may earn a commission for purchases using our links, as described in our affiliate disclosure.

Happy Gifting!


Popular pages

september calendar